Living at Home During a Painting Project — What Each Stage Looks Like
What your house looks like at each stage of a large interior painting project, from floor protection to plastic-wrapped rooms for sprayed ceilings and cabinets, and how to plan a cabinet job while you live there.

A large interior project — a whole main level, every ceiling in the house, or a kitchen full of cabinets — changes how your house looks for a week or two. Most of that is plastic, paper and tape, and it all comes down at the end. This guide walks through each stage with photos from our own jobs so you know what you will see, which rooms you can use, and how to plan around it.
The stages at a glance
| Stage | What you will see | Your rooms |
|---|---|---|
| 1. Protection | Floor paper, furniture wrapped in plastic, plastic dust barriers with zip doors | Work rooms off-limits; a clear path through the house |
| 2. Prep | Patching, caulking and sanding; work lights and dust-extracting vacuums | Noisiest stage; rooms closed off |
| 3. Primer | Stains, patches and oak sealed with primer | Shellac primer has an odor for a few hours; air movers pull it outside |
| 4. Masking for spray | Whole rooms wrapped in plastic, windows covered, air movers running | Wrapped rooms closed: a day or two for ceilings, three to four days or more for kitchens |
| 5. Finish coats | Two coats on walls, trim, ceilings or cabinets | Rooms reopen as each one is finished |
| 6. Reset and walkthrough | Plastic and paper removed, covers back on, furniture returned | Everything back in use |
Not every project uses every stage. A walls-only repaint skips the spray masking; a cabinet job adds a stretch where the doors are off site.
Stage 1: Protection goes up
The first day is mostly protection. Floors are covered edge to edge with paper or drop cloths taped at the edges, furniture is moved to the middle of the room and wrapped in plastic, and outlet covers, switch plates and vent covers come off. Where we will sand or spray, plastic barriers with zippered doors close the work area off from the rest of the house.
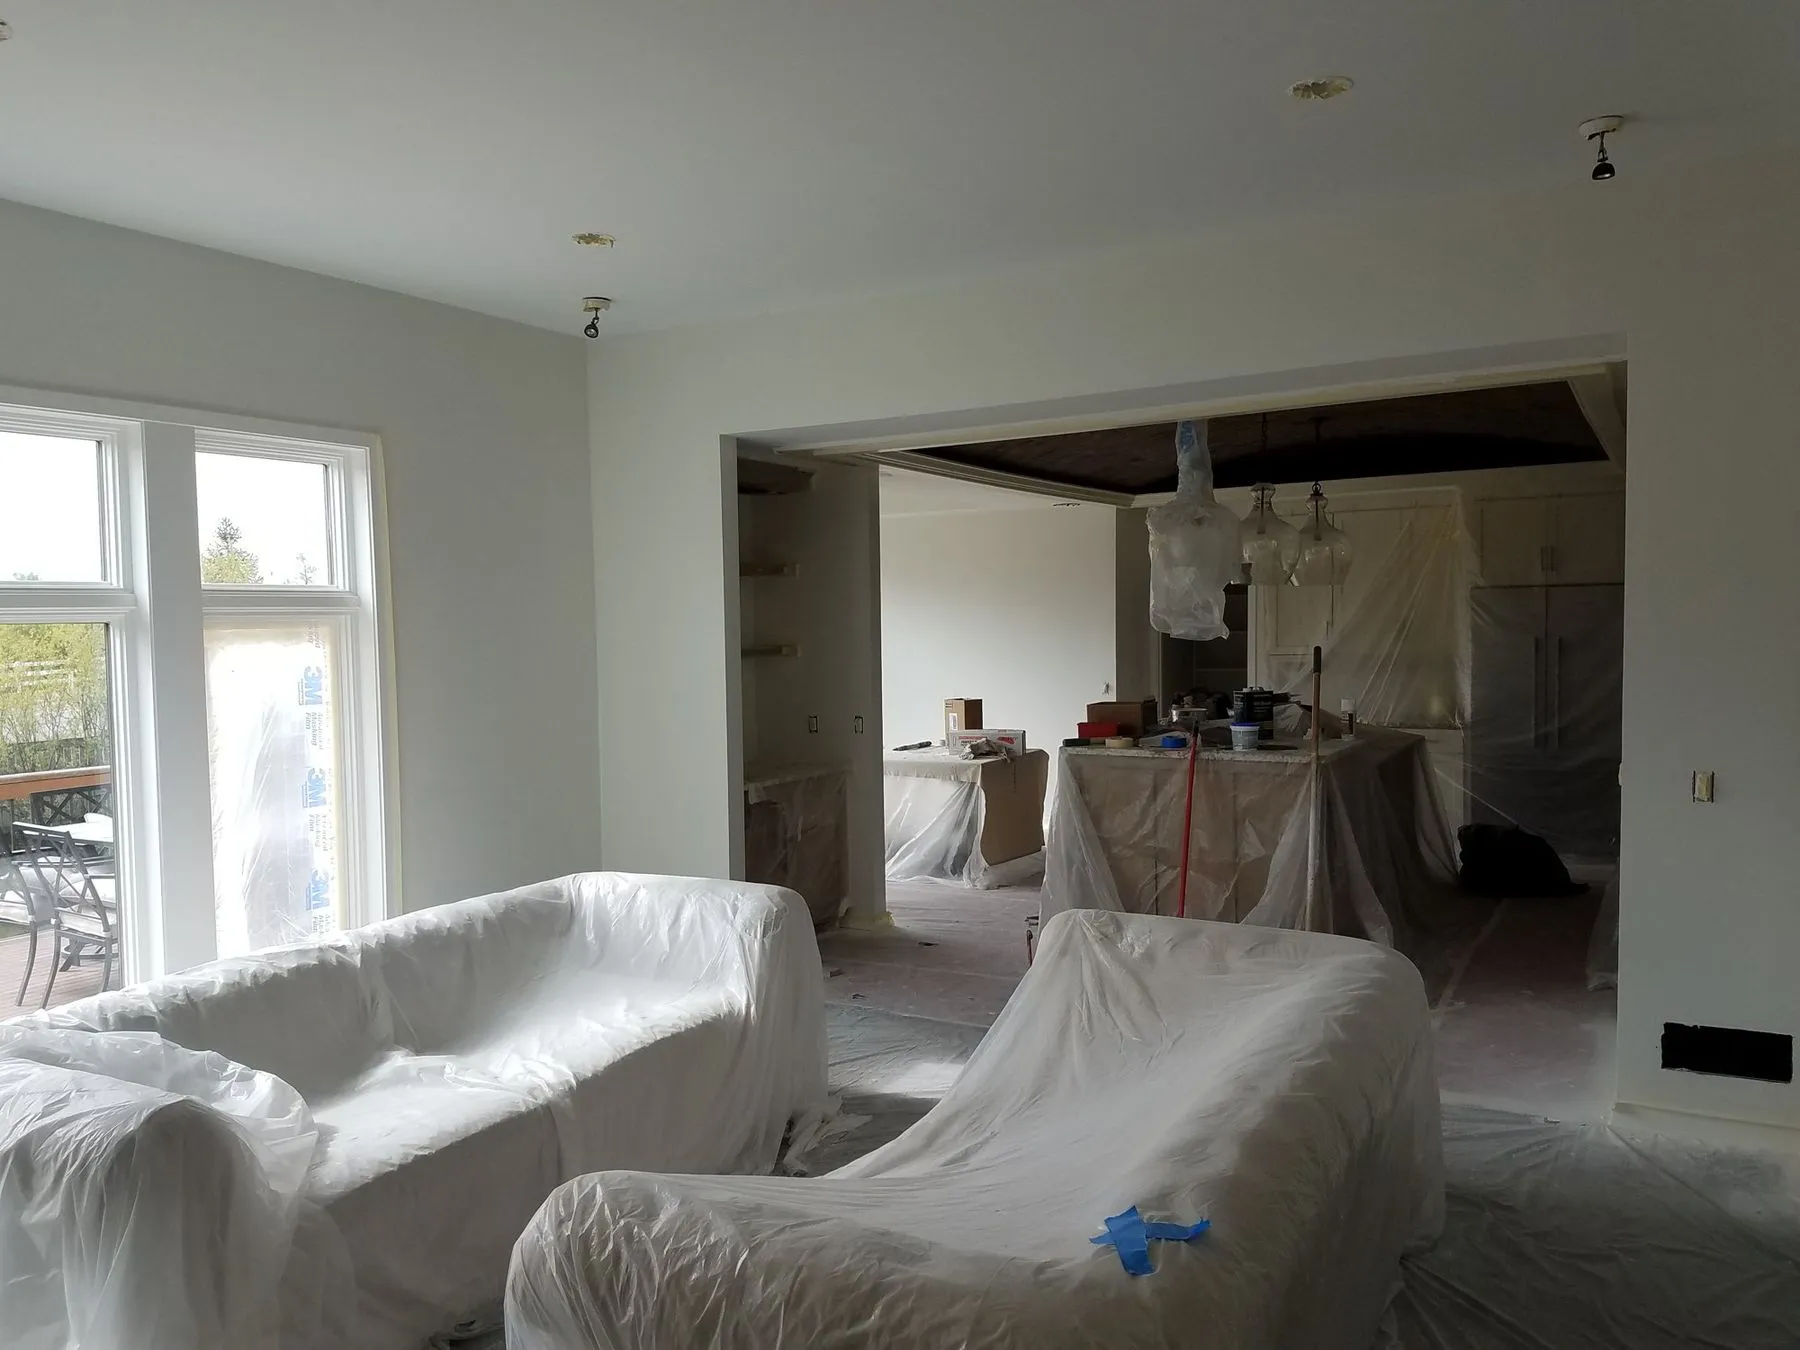
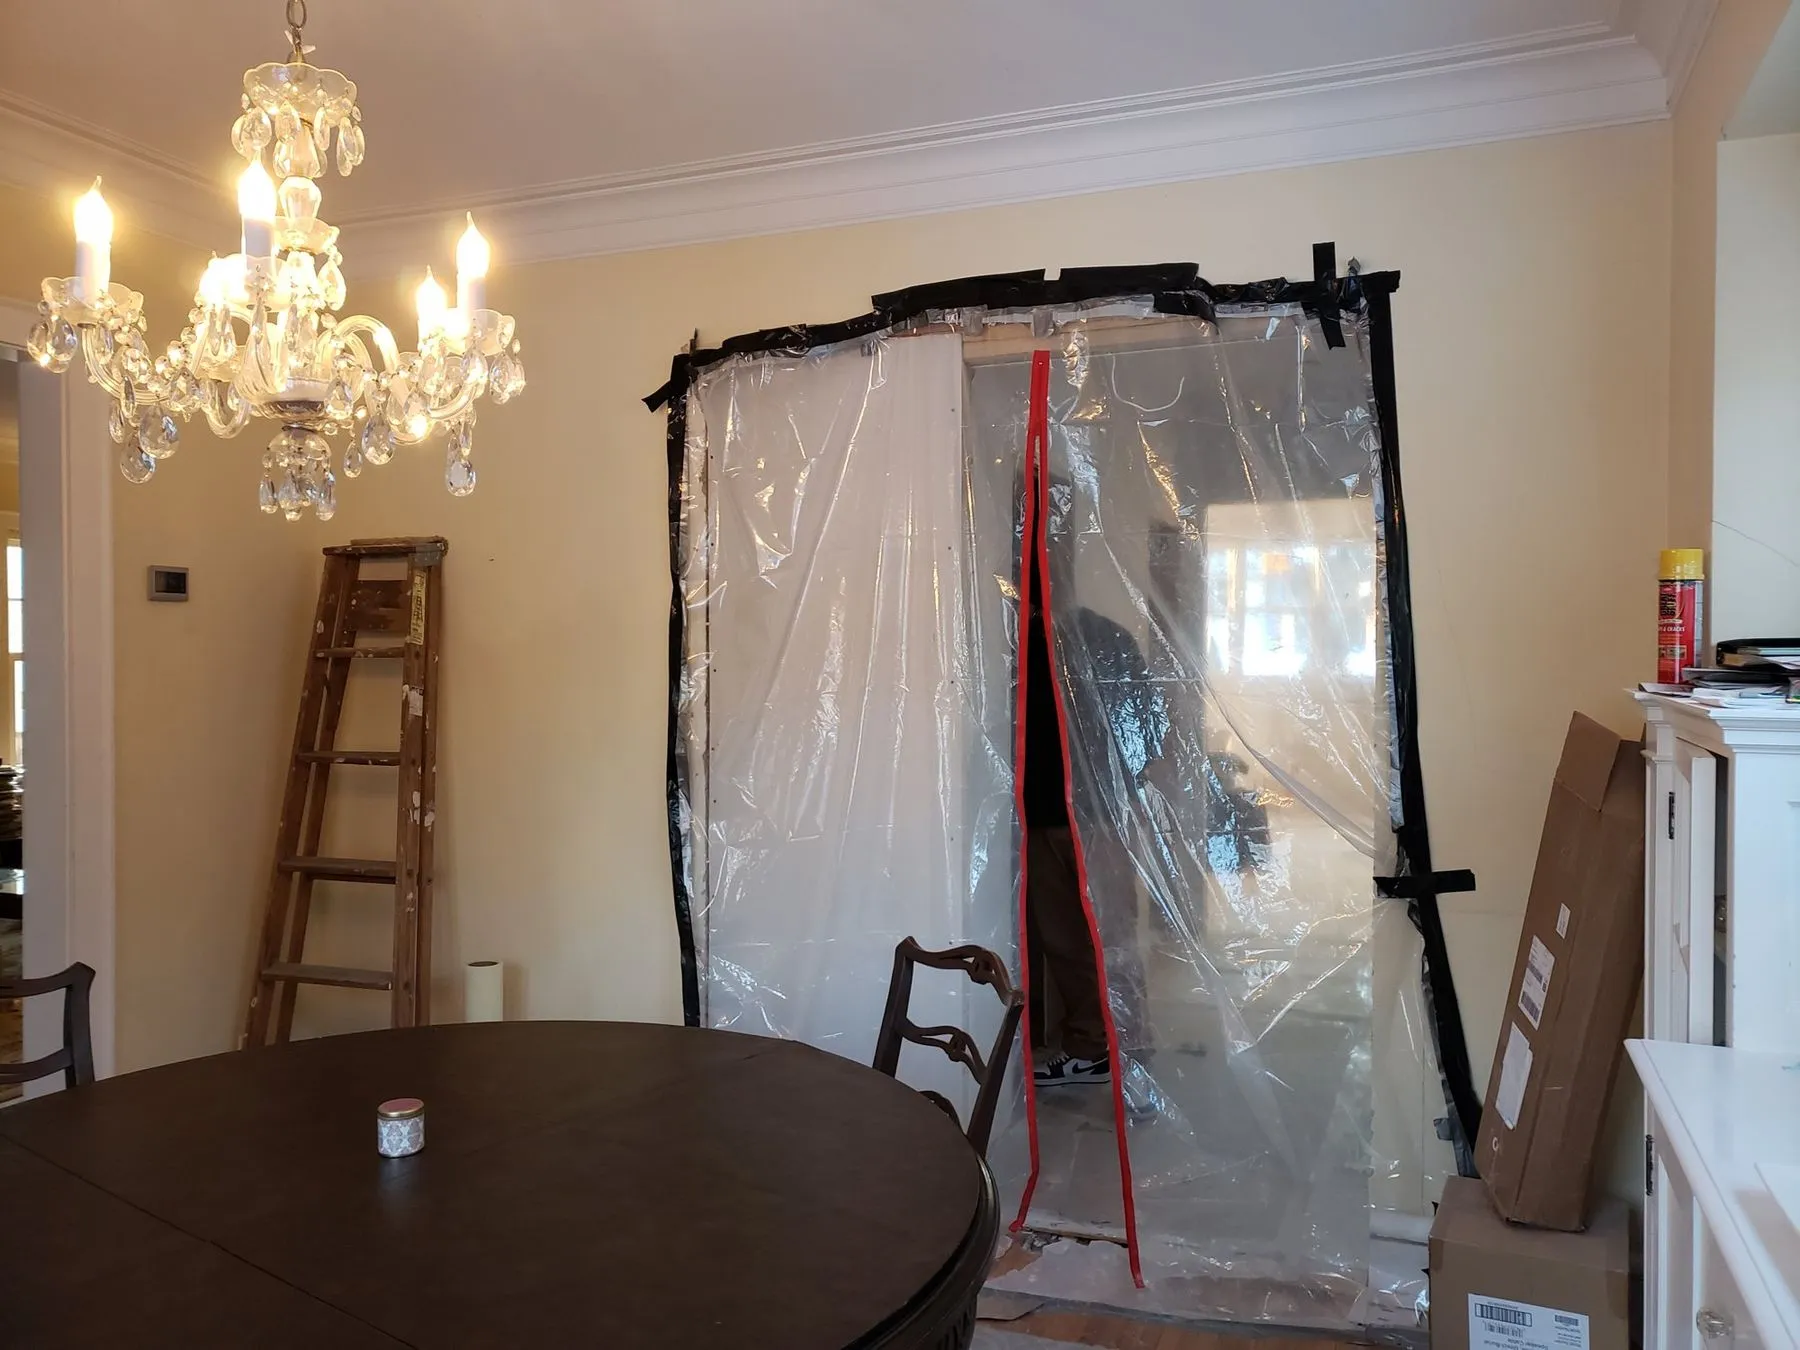 Furniture moved and wrapped, and a plastic barrier with a zip door between the work area and the dining room.
Stairs and hallways you need to walk through stay open, with the treads and floors covered.
Stage 2: Prep — the noisiest part
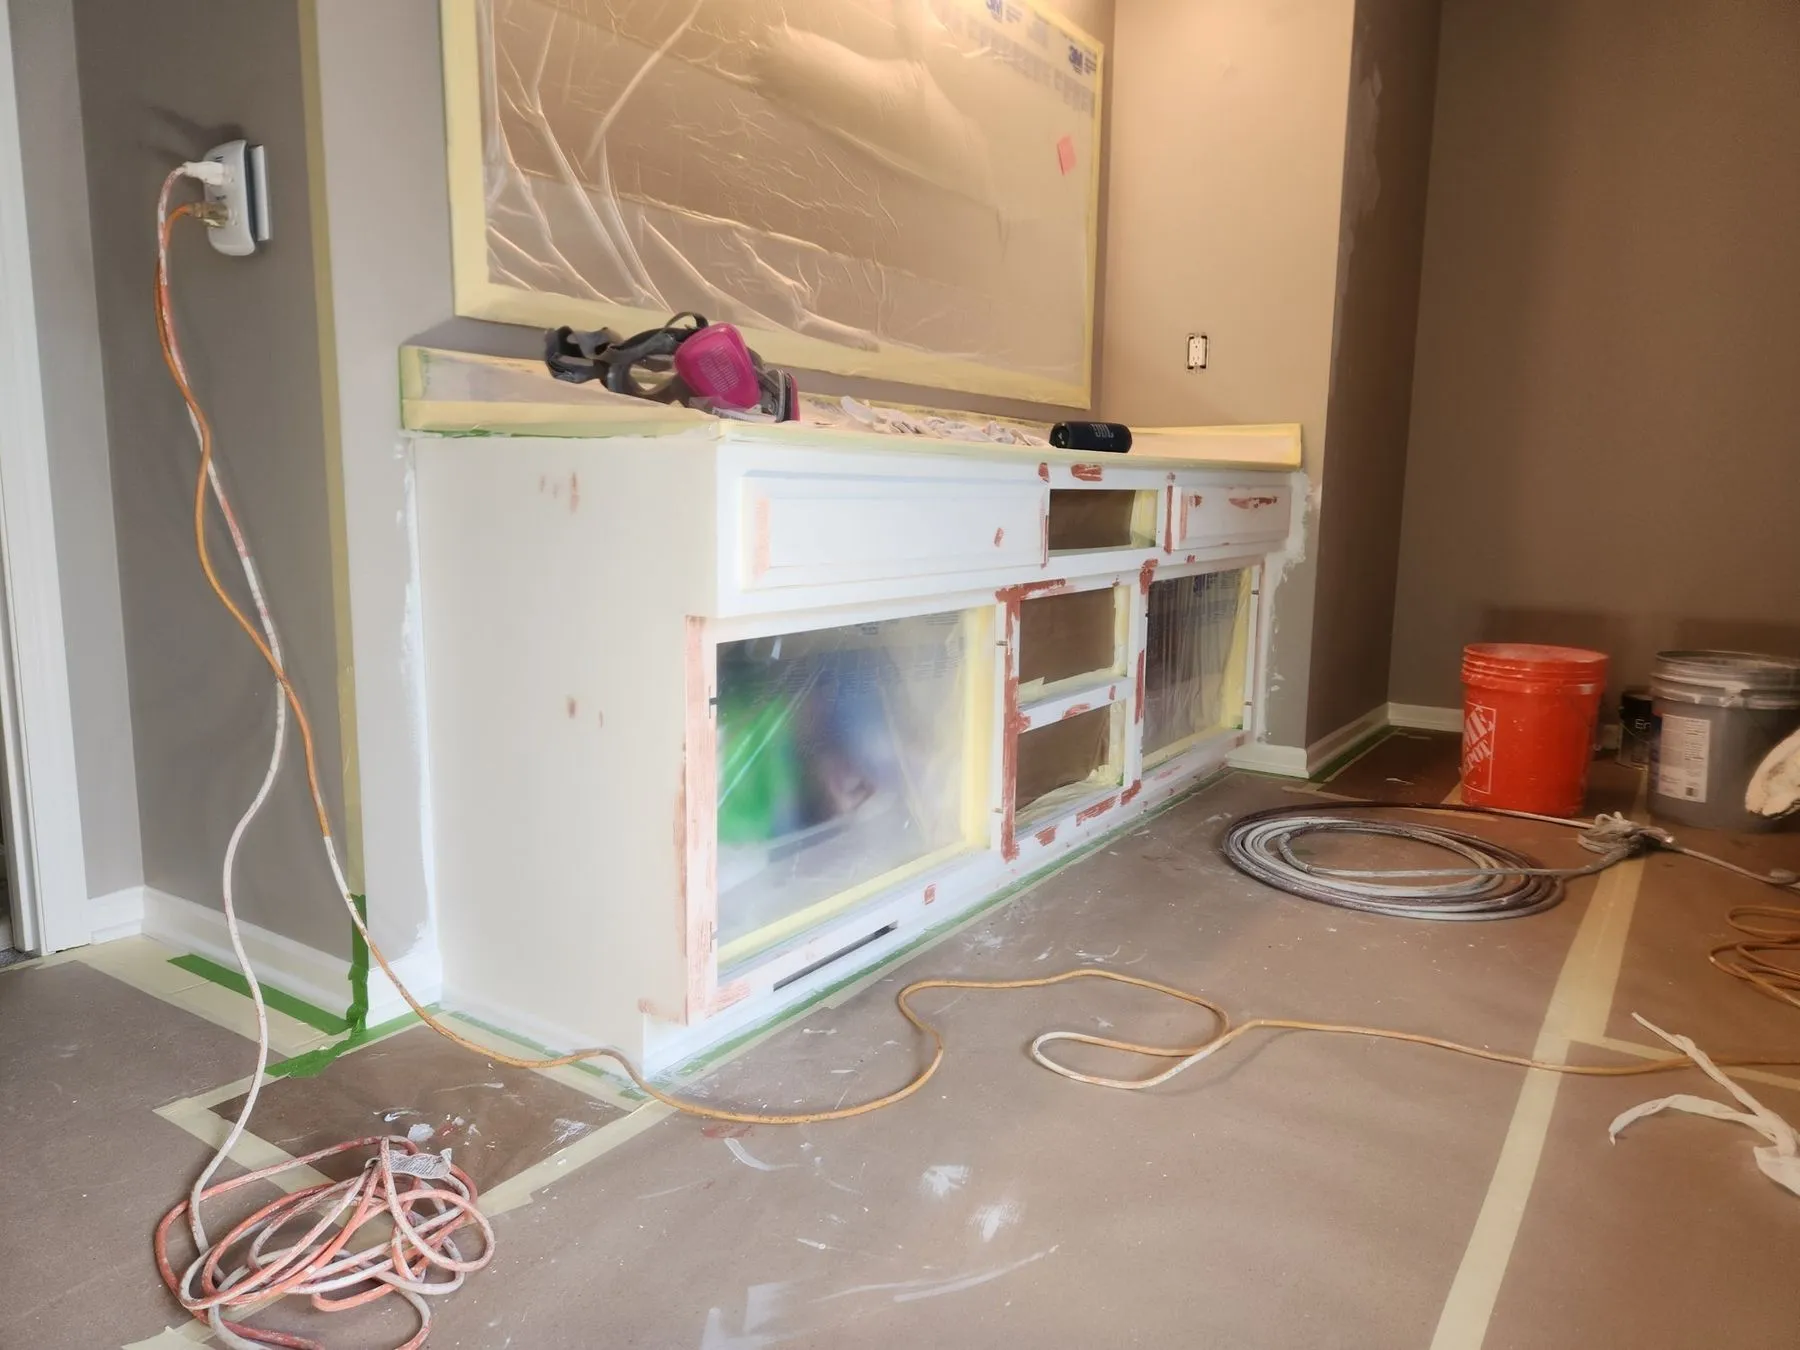
Prep is the stage that takes longest and makes the most noise: filling dents and nail holes, caulking gaps, and sanding. On cabinets and trim we sand with sanders connected to dust-extracting vacuums, which pull dust away as it is made. Rooms being sanded stay behind their barriers.
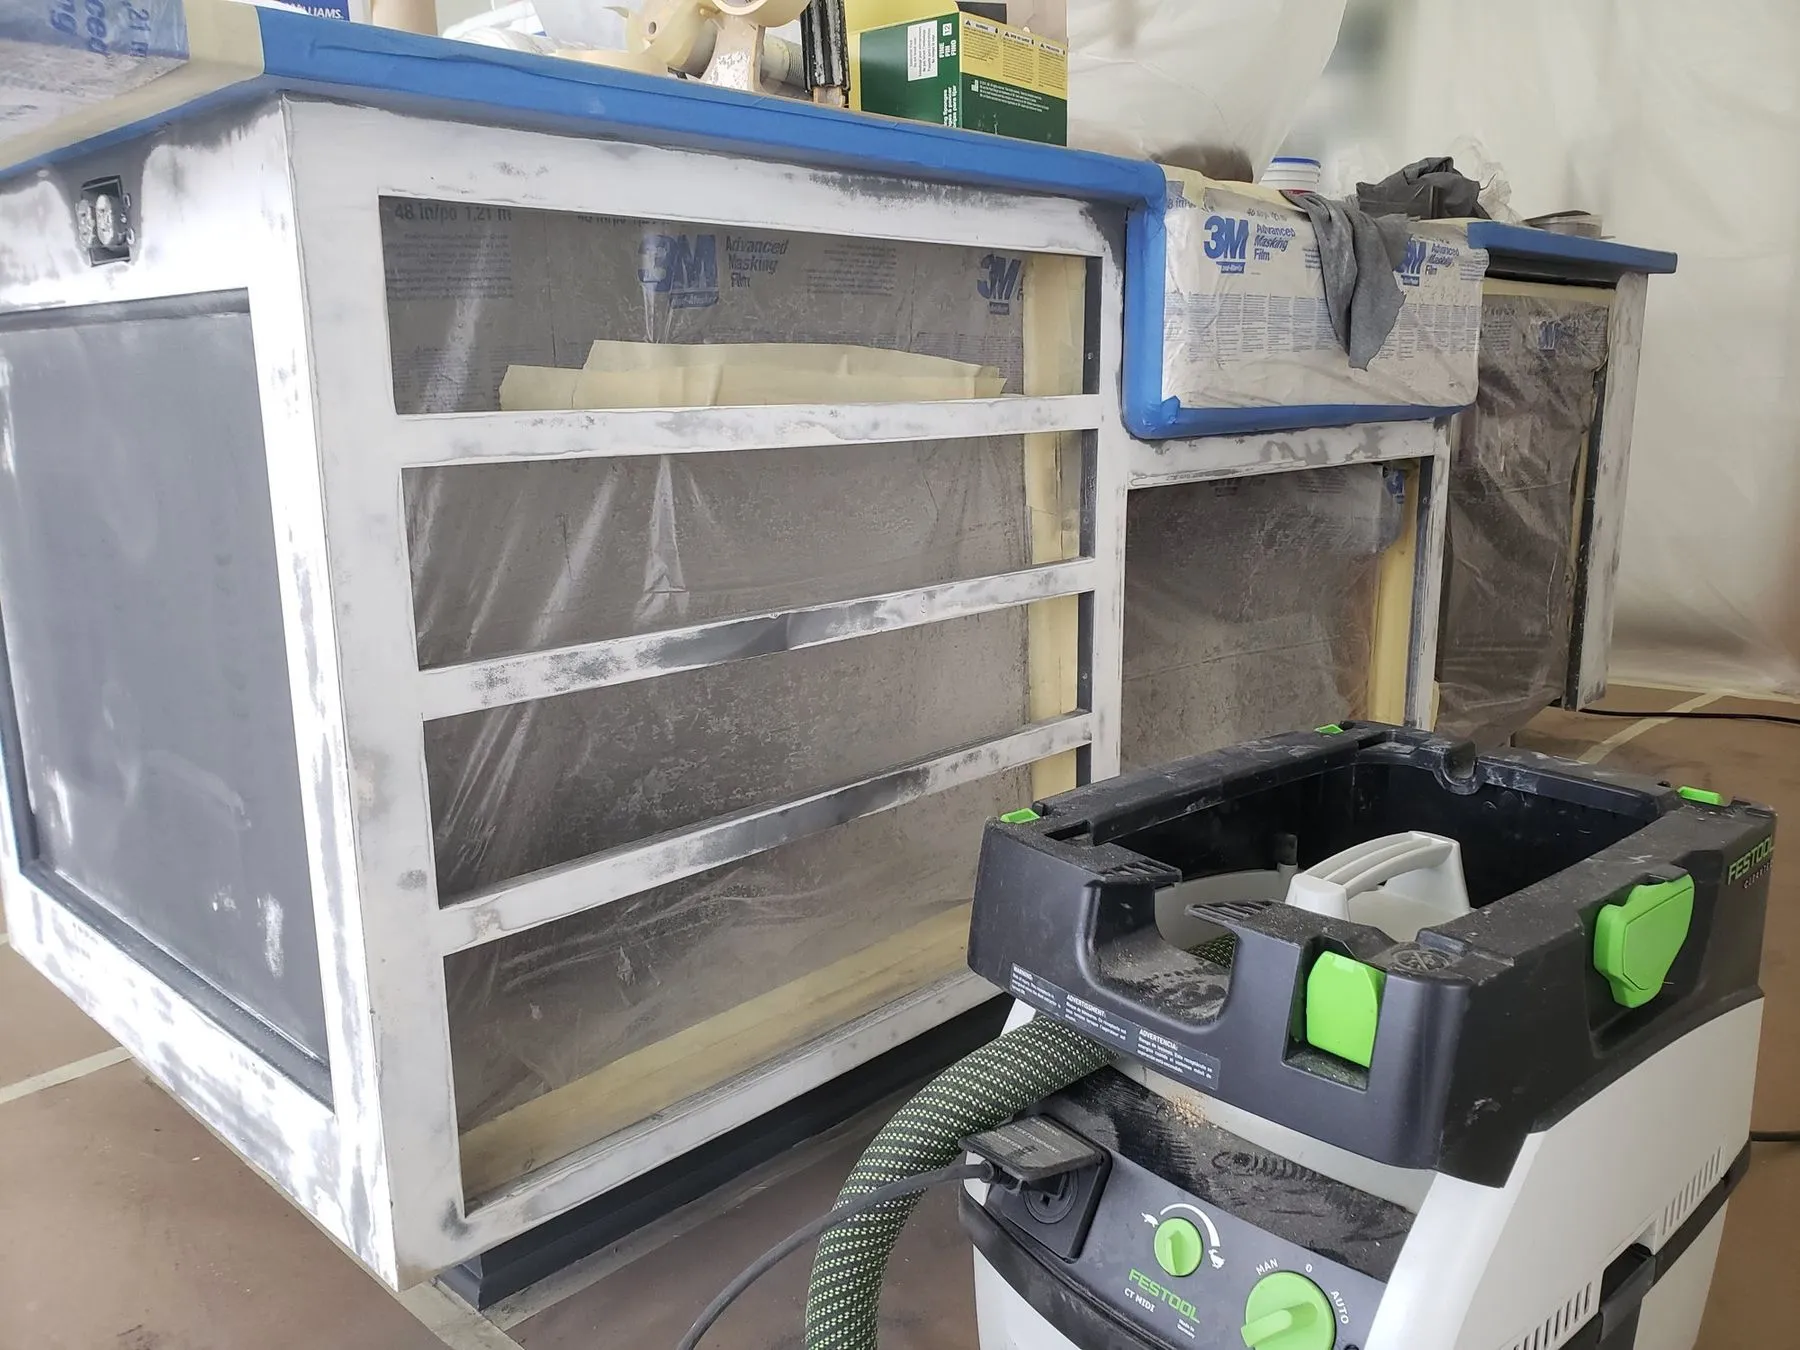 A kitchen island being sanded. The vacuum hose connects to the sander, so most of the dust never reaches the air.
Stage 3: Primer
Patches, stains and bare wood get primer before any finish coat. Oak gets a shellac-based primer so its tannins cannot bleed through white paint.
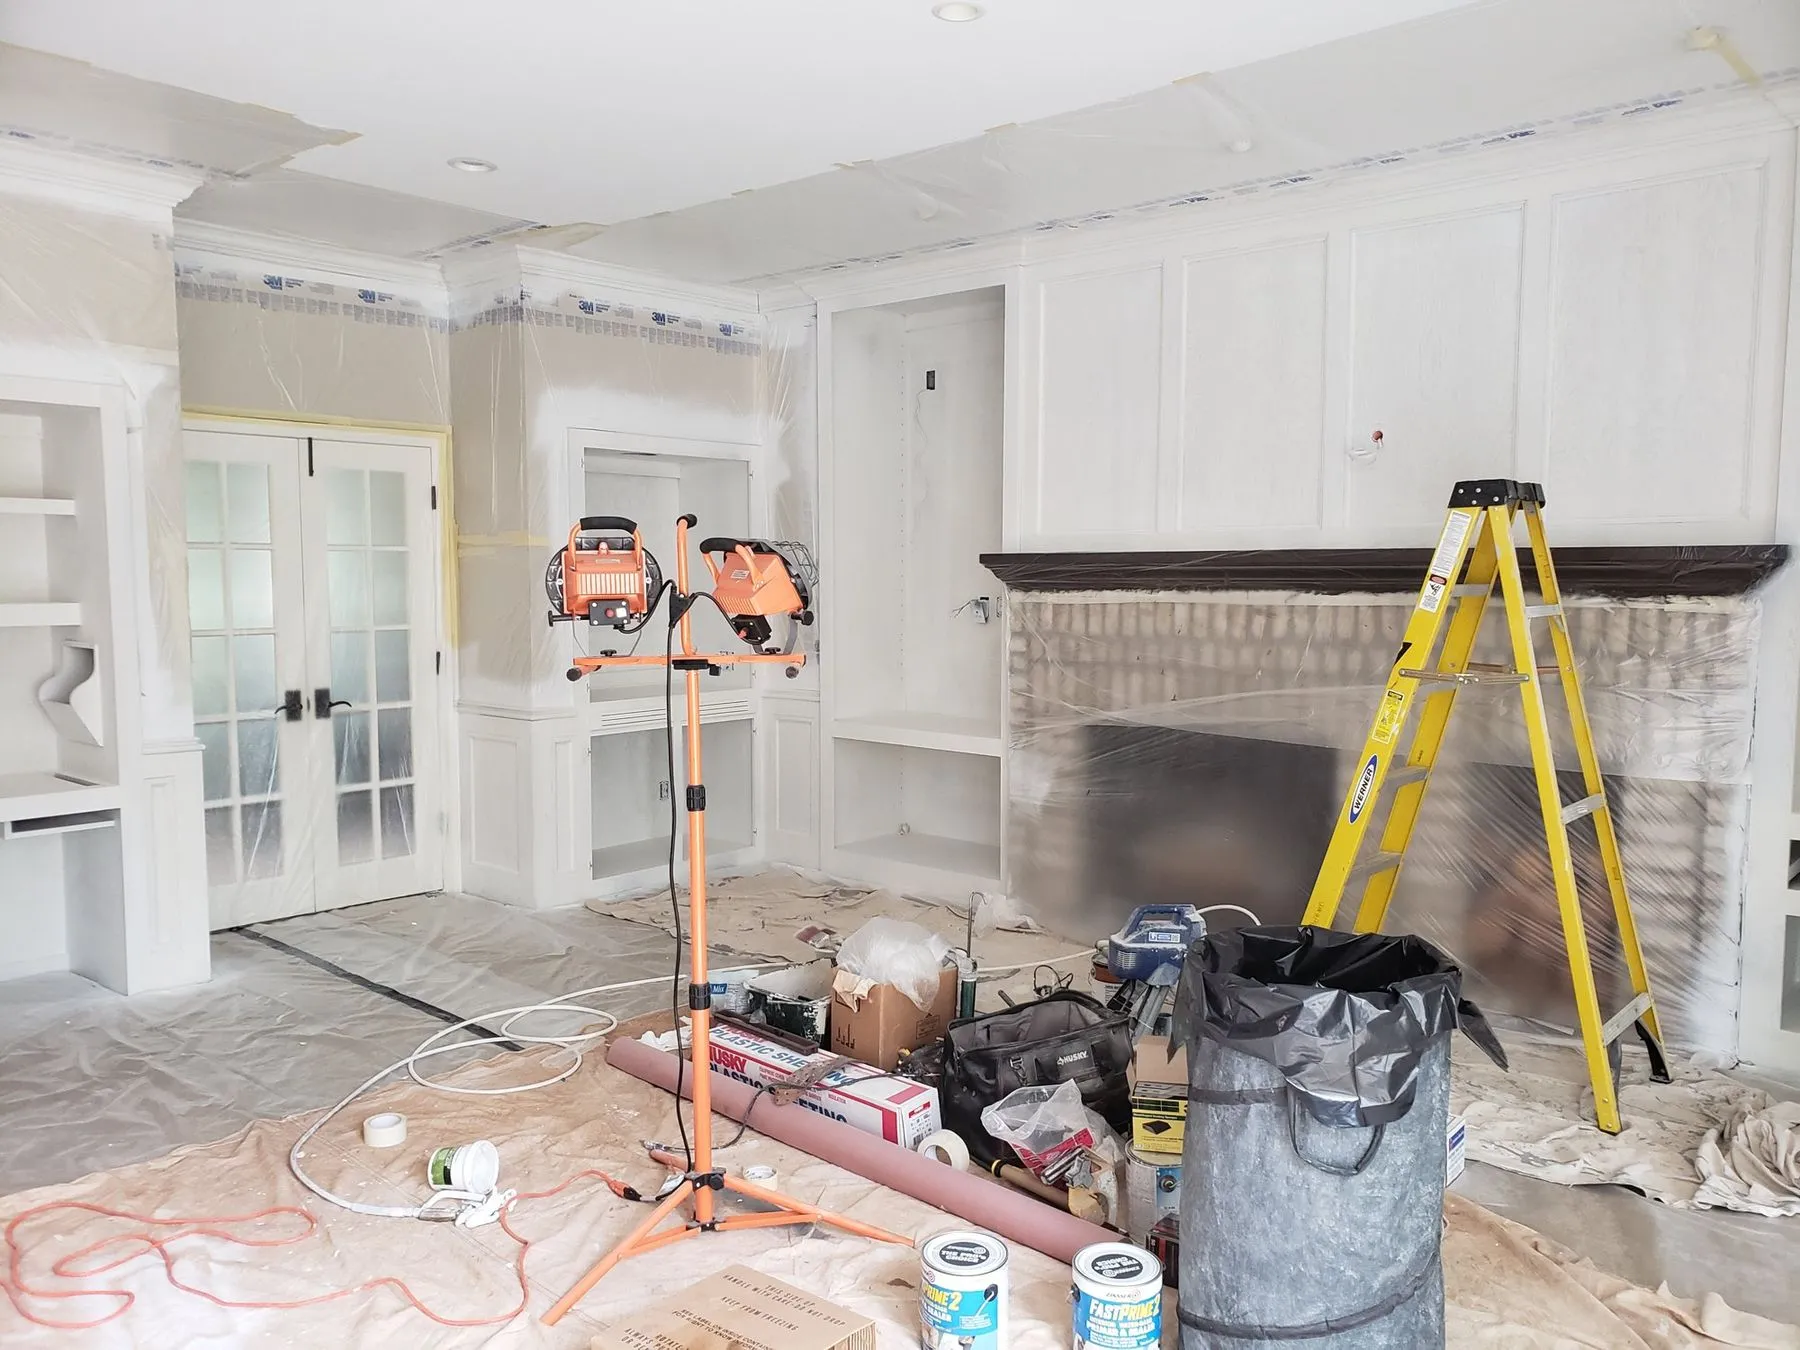 Built-ins and trim primed white. Work lights stay up so every surface can be checked before the finish coats.
Shellac primer smells strongly of alcohol while it goes on. To clear it, we set up air movers with ducting that runs out a window, pulling the fumes out of the house instead of letting them spread through it. The primer dries fast, and with the air movers running the smell is usually gone within a few hours. If odors bother you, plan to be out that day.
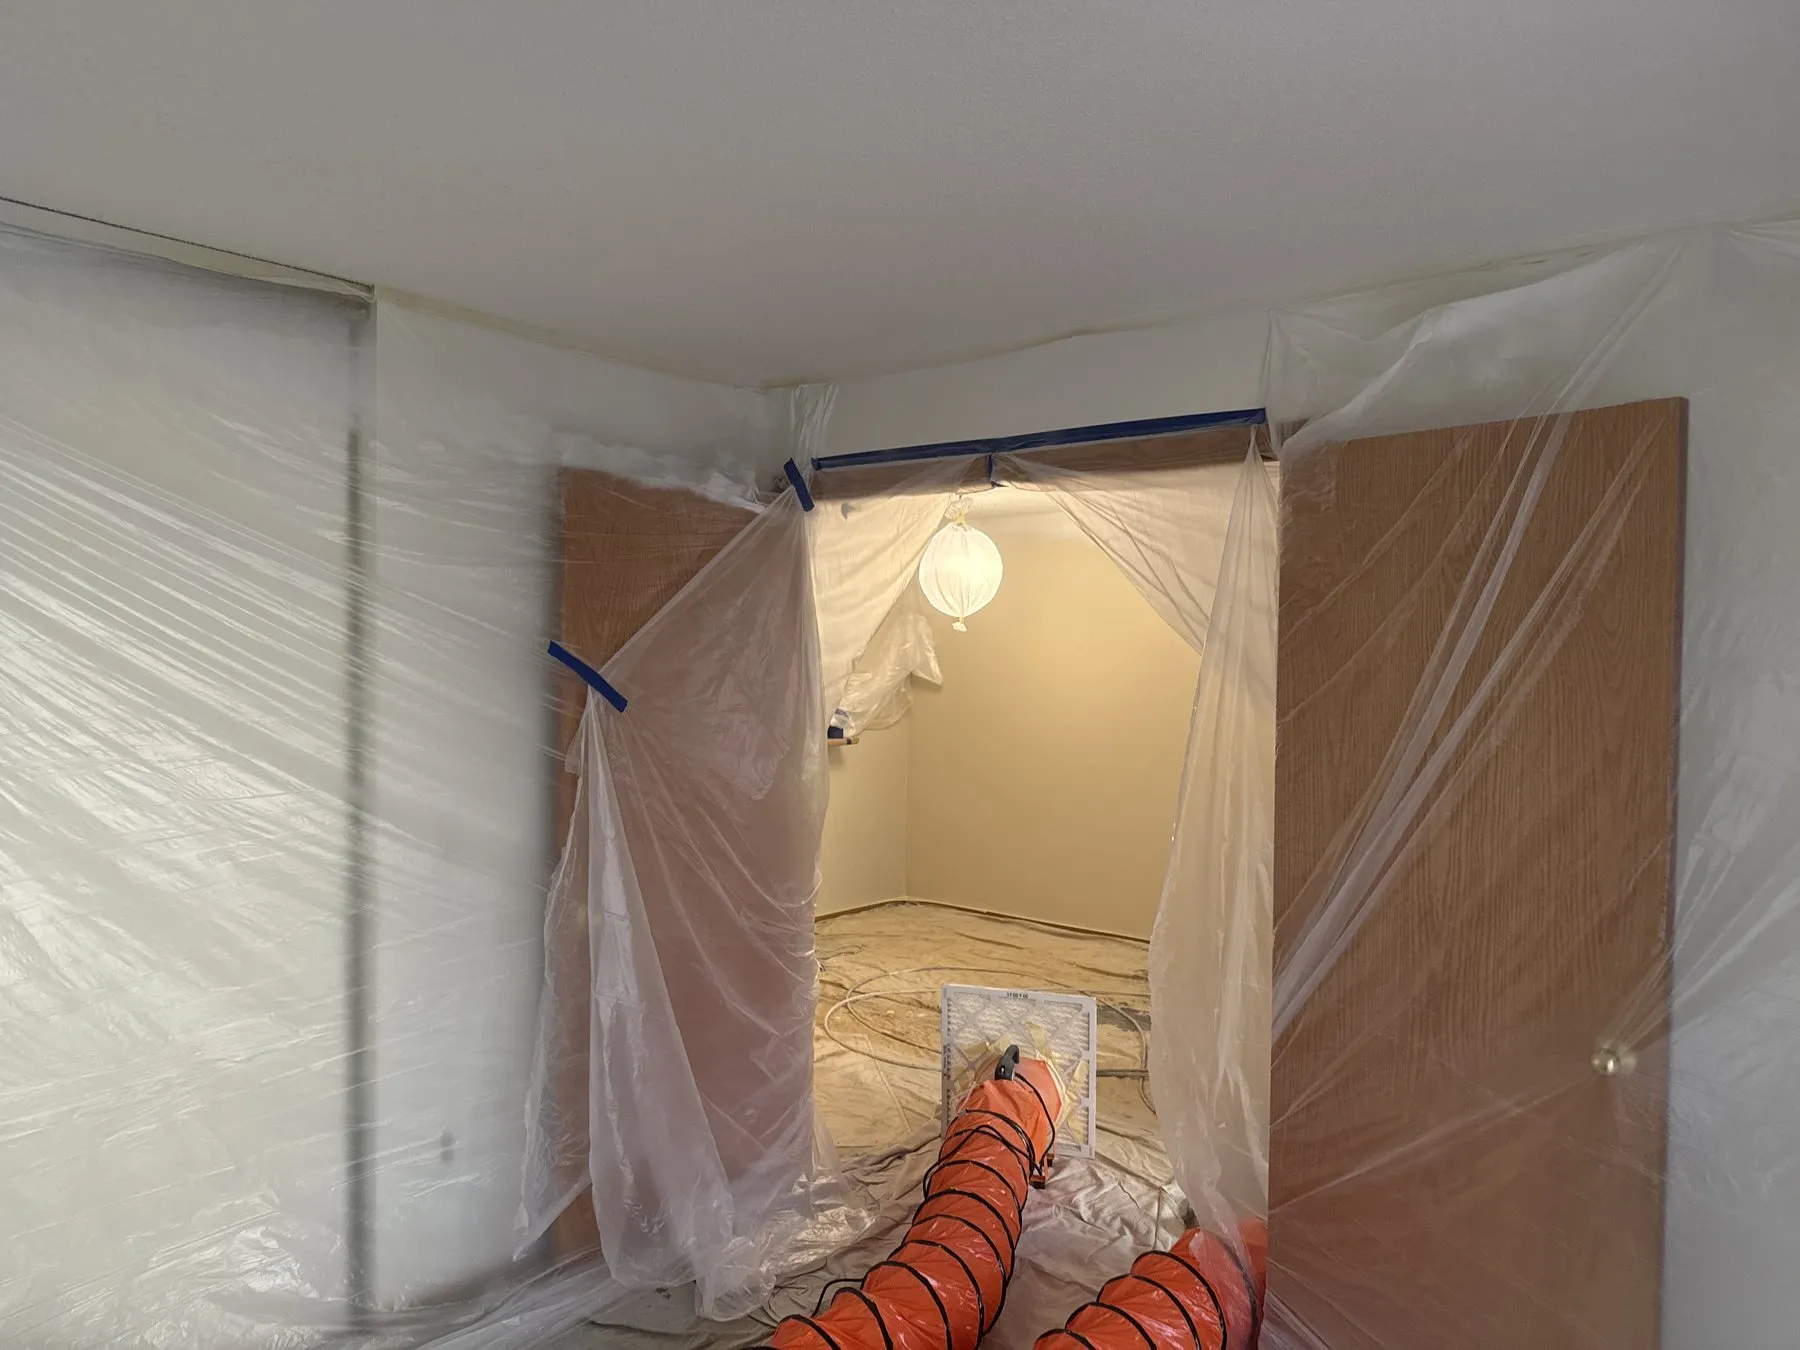 Air movers at work in an Edina condo. The orange ducting carries air from the work area out through a window.
Stage 4: Masking for a sprayed finish
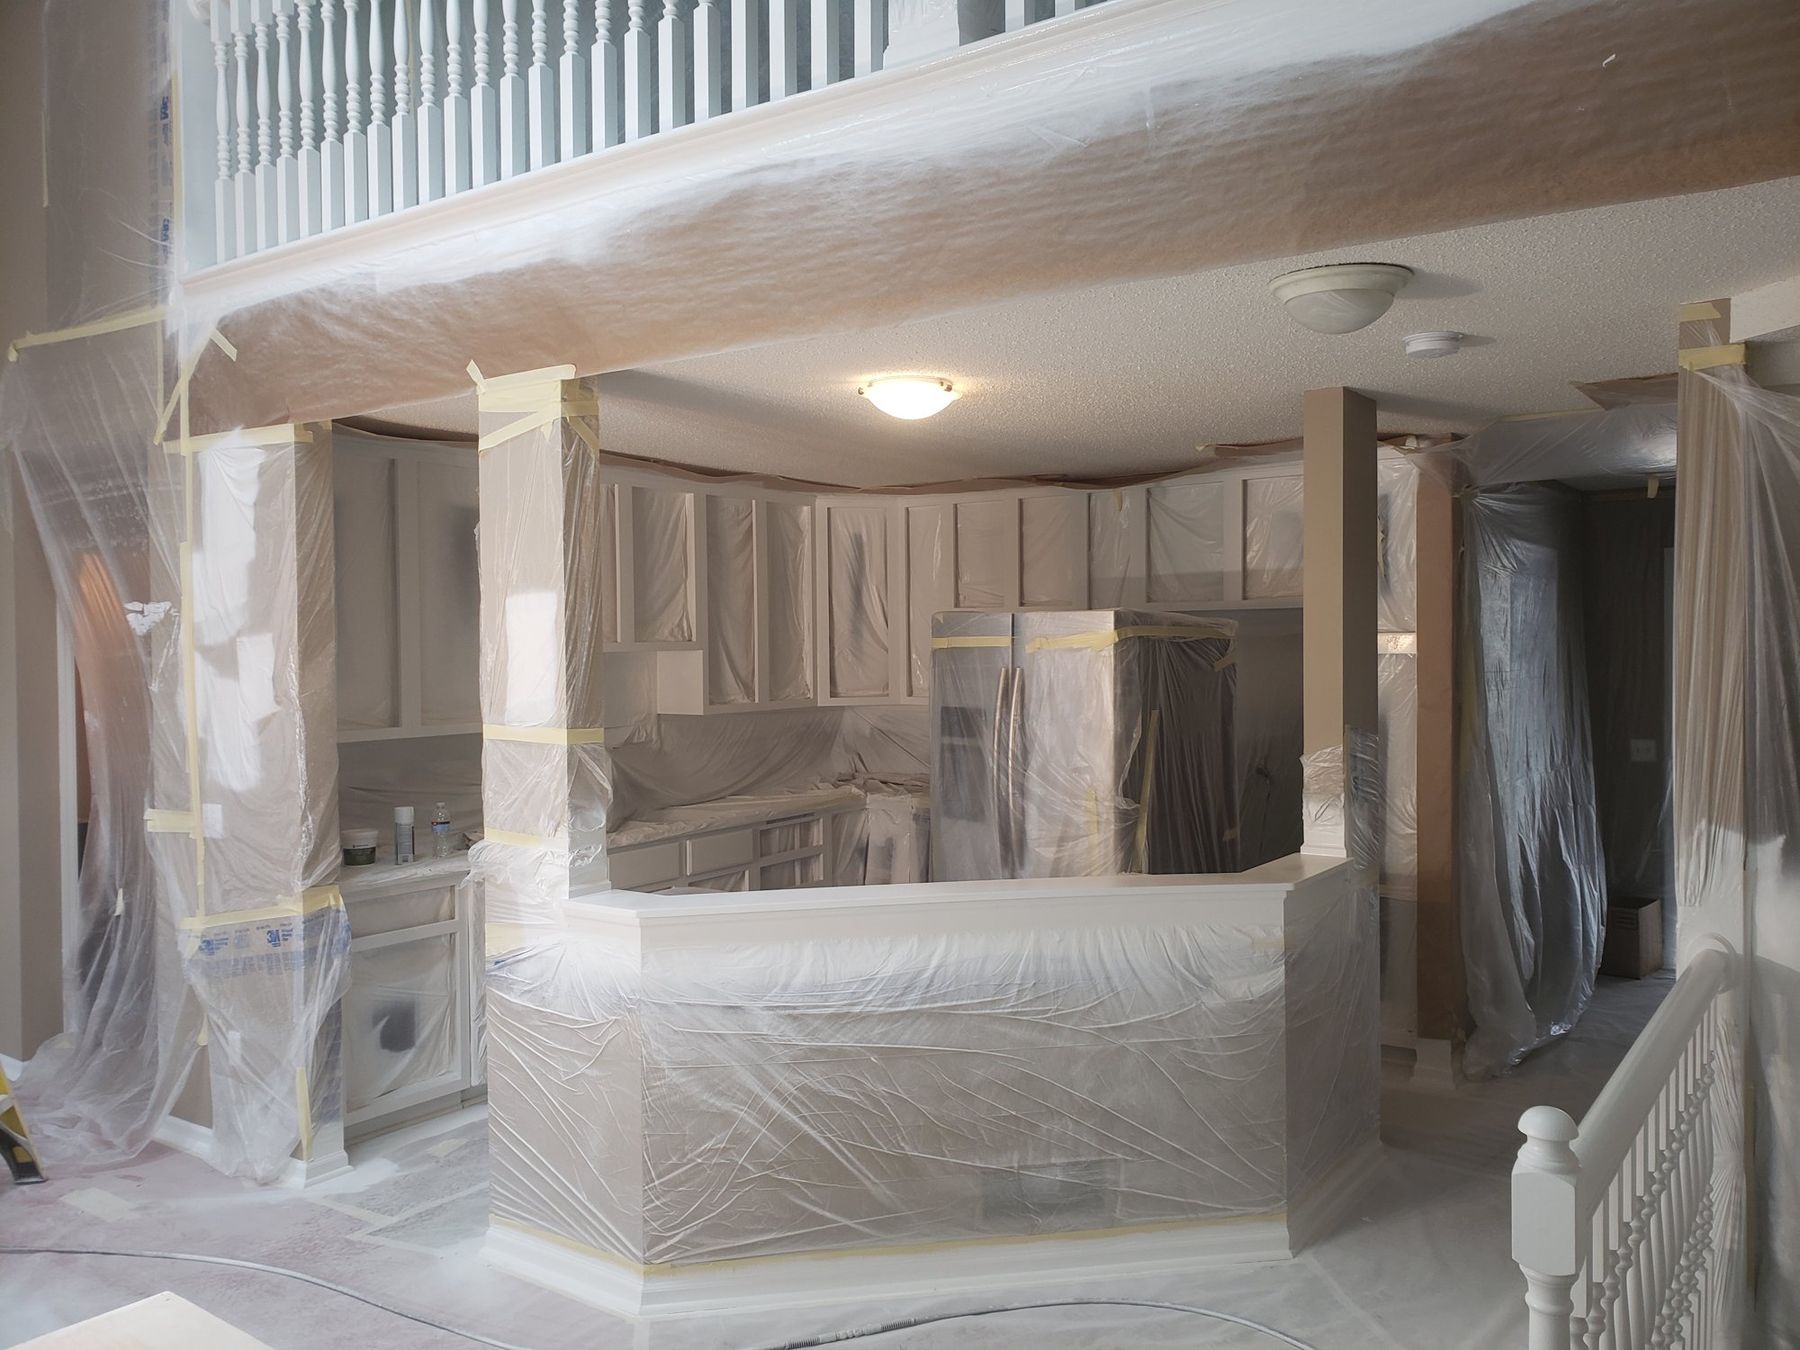
This is the stage that surprises people. When we spray — ceilings, cabinet frames, built-ins, trim — the room is wrapped in plastic from floor to ceiling. Windows, doors, countertops, appliances and anything else that stays in the room are covered. Spray paint produces a fine mist that travels; full masking is what keeps it on the surface being painted and off everything else.
 A bathroom vanity masked off from the walls and floor, ready to spray.
Wrapped rooms stay closed while they are wrapped: usually a day or two for a ceiling, and three to four days or more for kitchen cabinet frames. The plastic comes down as soon as the last coat is on.
Stage 5: Finish coats
Two finish coats go on every surface. Walls are cut in and rolled; trim, doors and cabinets get enamel. As each room is finished it reopens, so most of the house comes back into use over the last few days rather than all at once.
Stage 6: Reset and final walkthrough
Plastic, paper and tape come down, outlet and switch covers go back on, and furniture returns to where it was. Then we walk the job with you under good light, and fix anything you point out. Paint is dry to the touch within hours but keeps hardening for weeks; see how to prepare for interior painters for care in the first two weeks.
Ceiling jobs: the whole room gets wrapped
Ceilings are sprayed, and they are sprayed first. Paint mist falls, so everything below the ceiling gets covered: floors, walls, windows, doors, cabinets, countertops, the fireplace, baseboard heaters and wall air-conditioning units. Light fixtures are wrapped in plastic and fire sprinkler heads are protected.
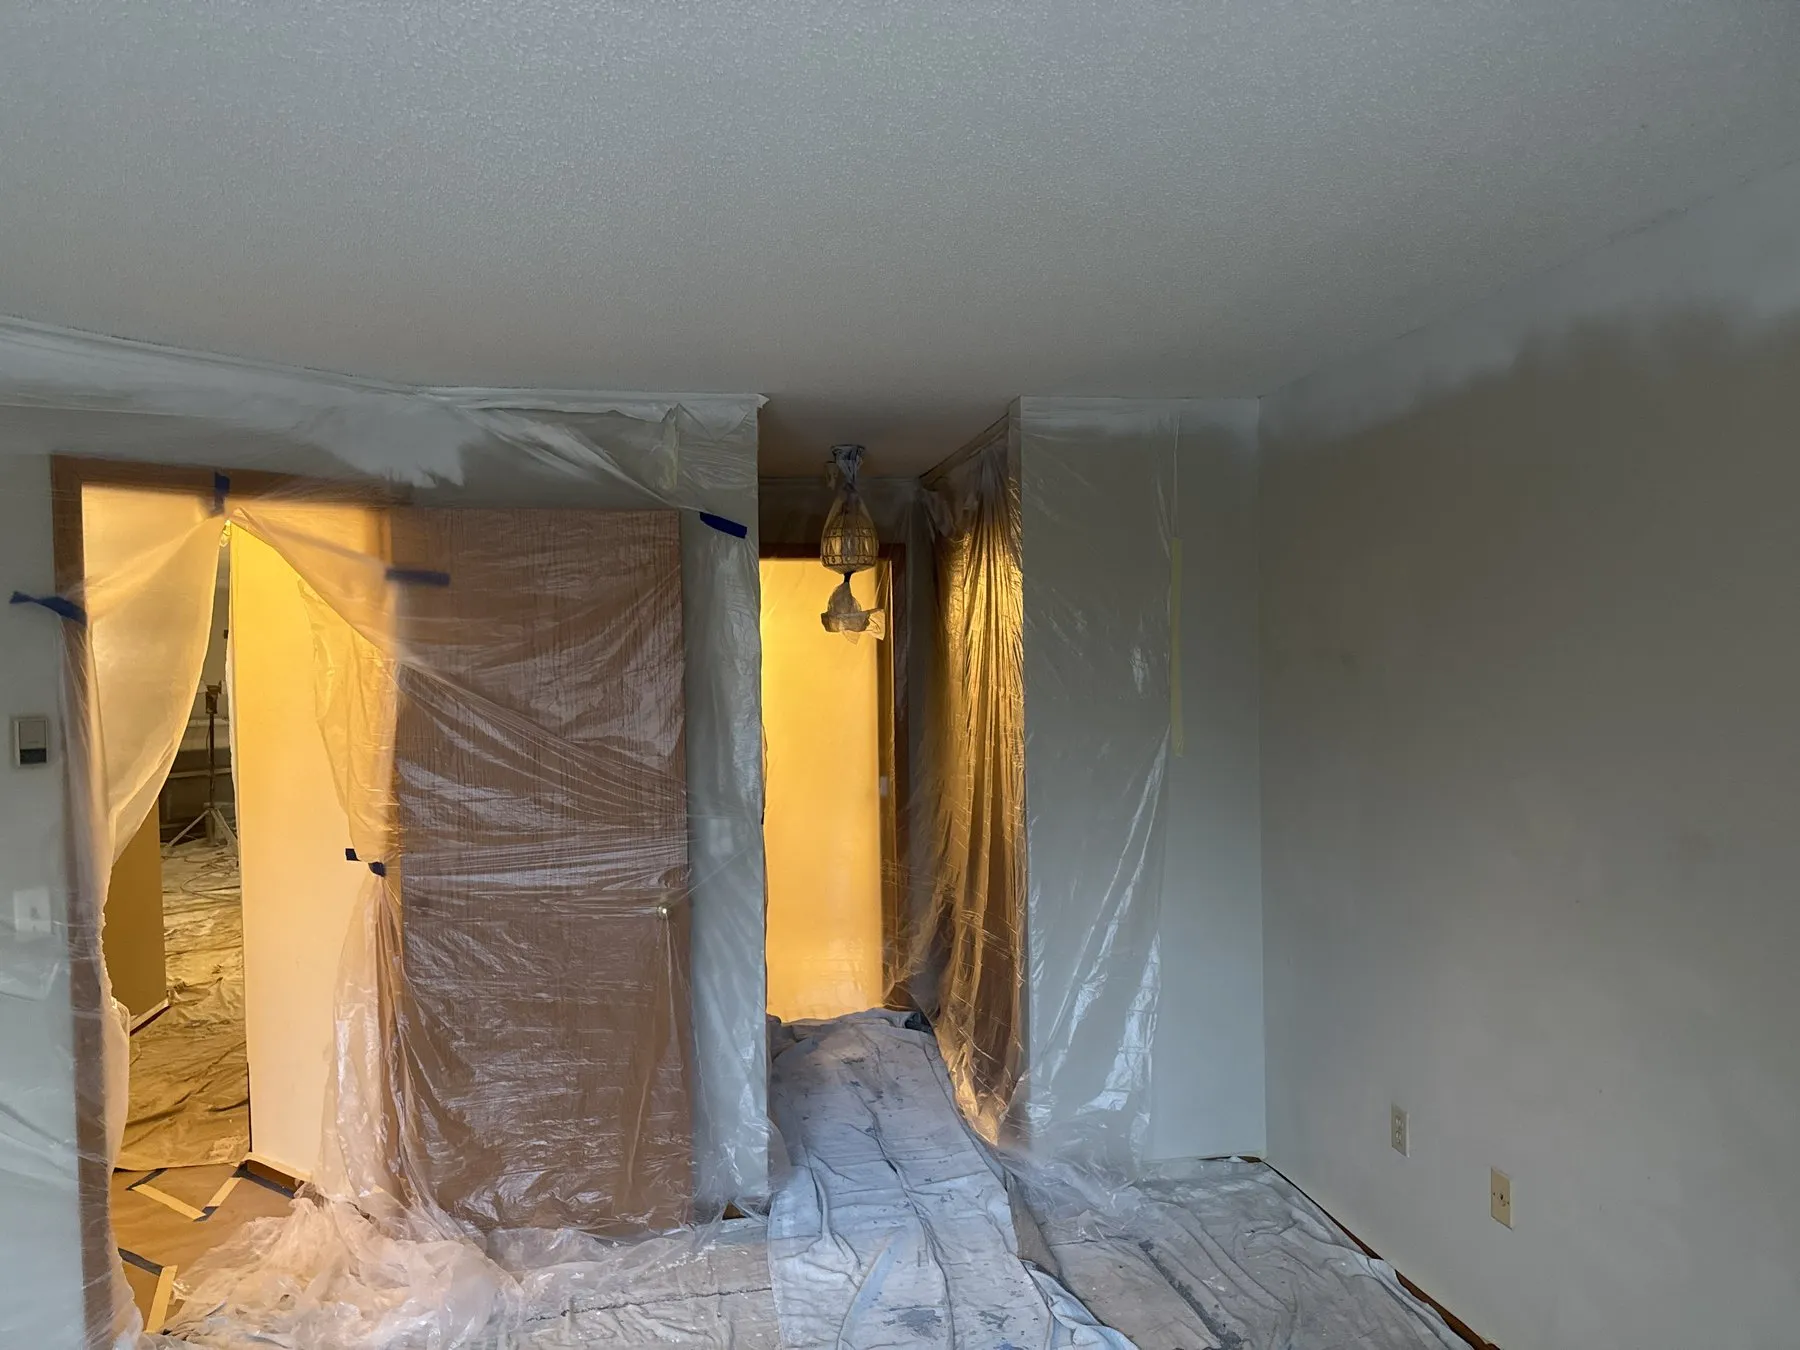
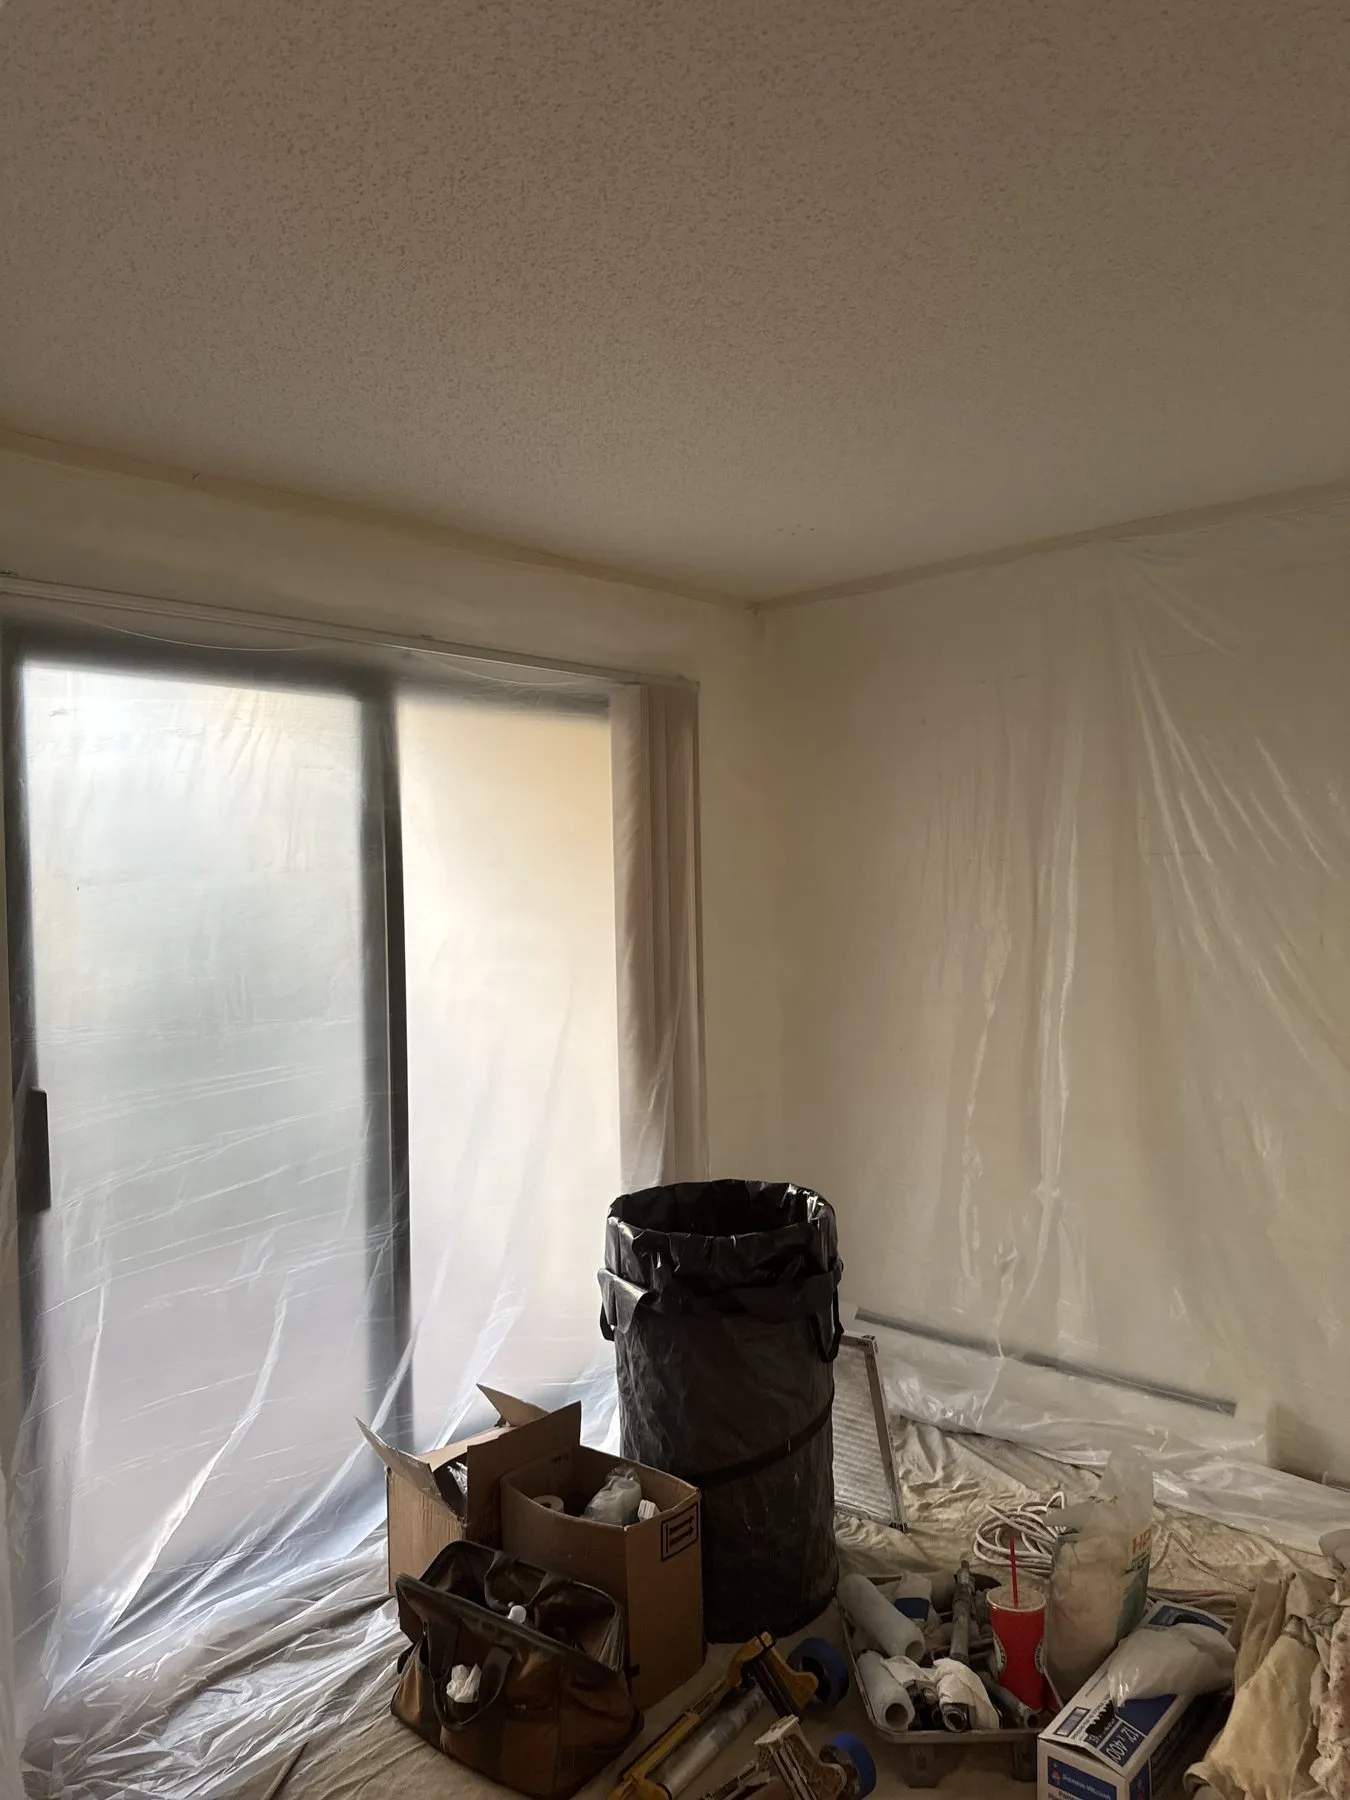 An Edina condo masked for ceiling spraying. Walls, doorways, the patio door and the floors are covered so only the ceiling is exposed.
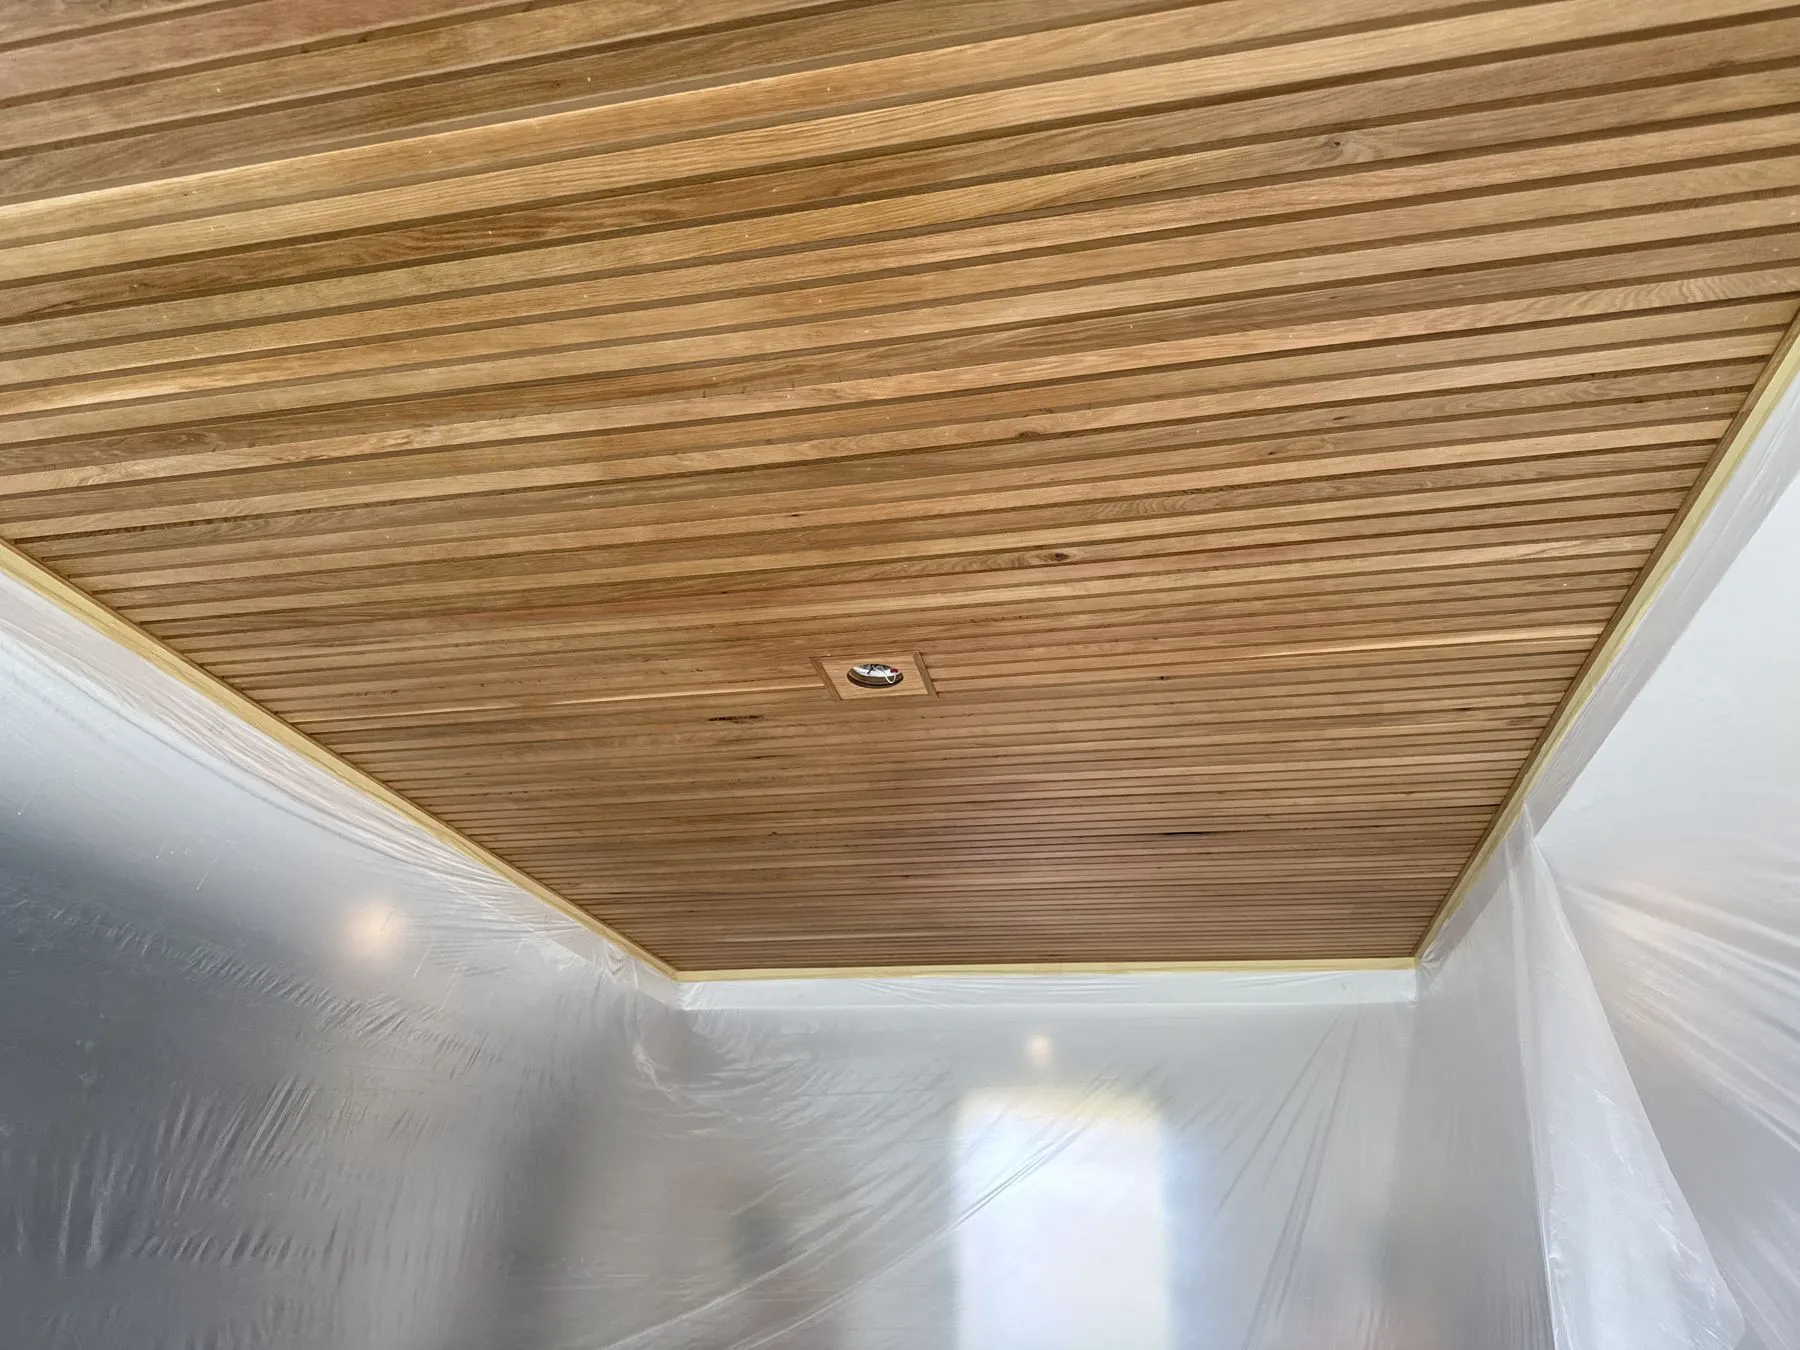
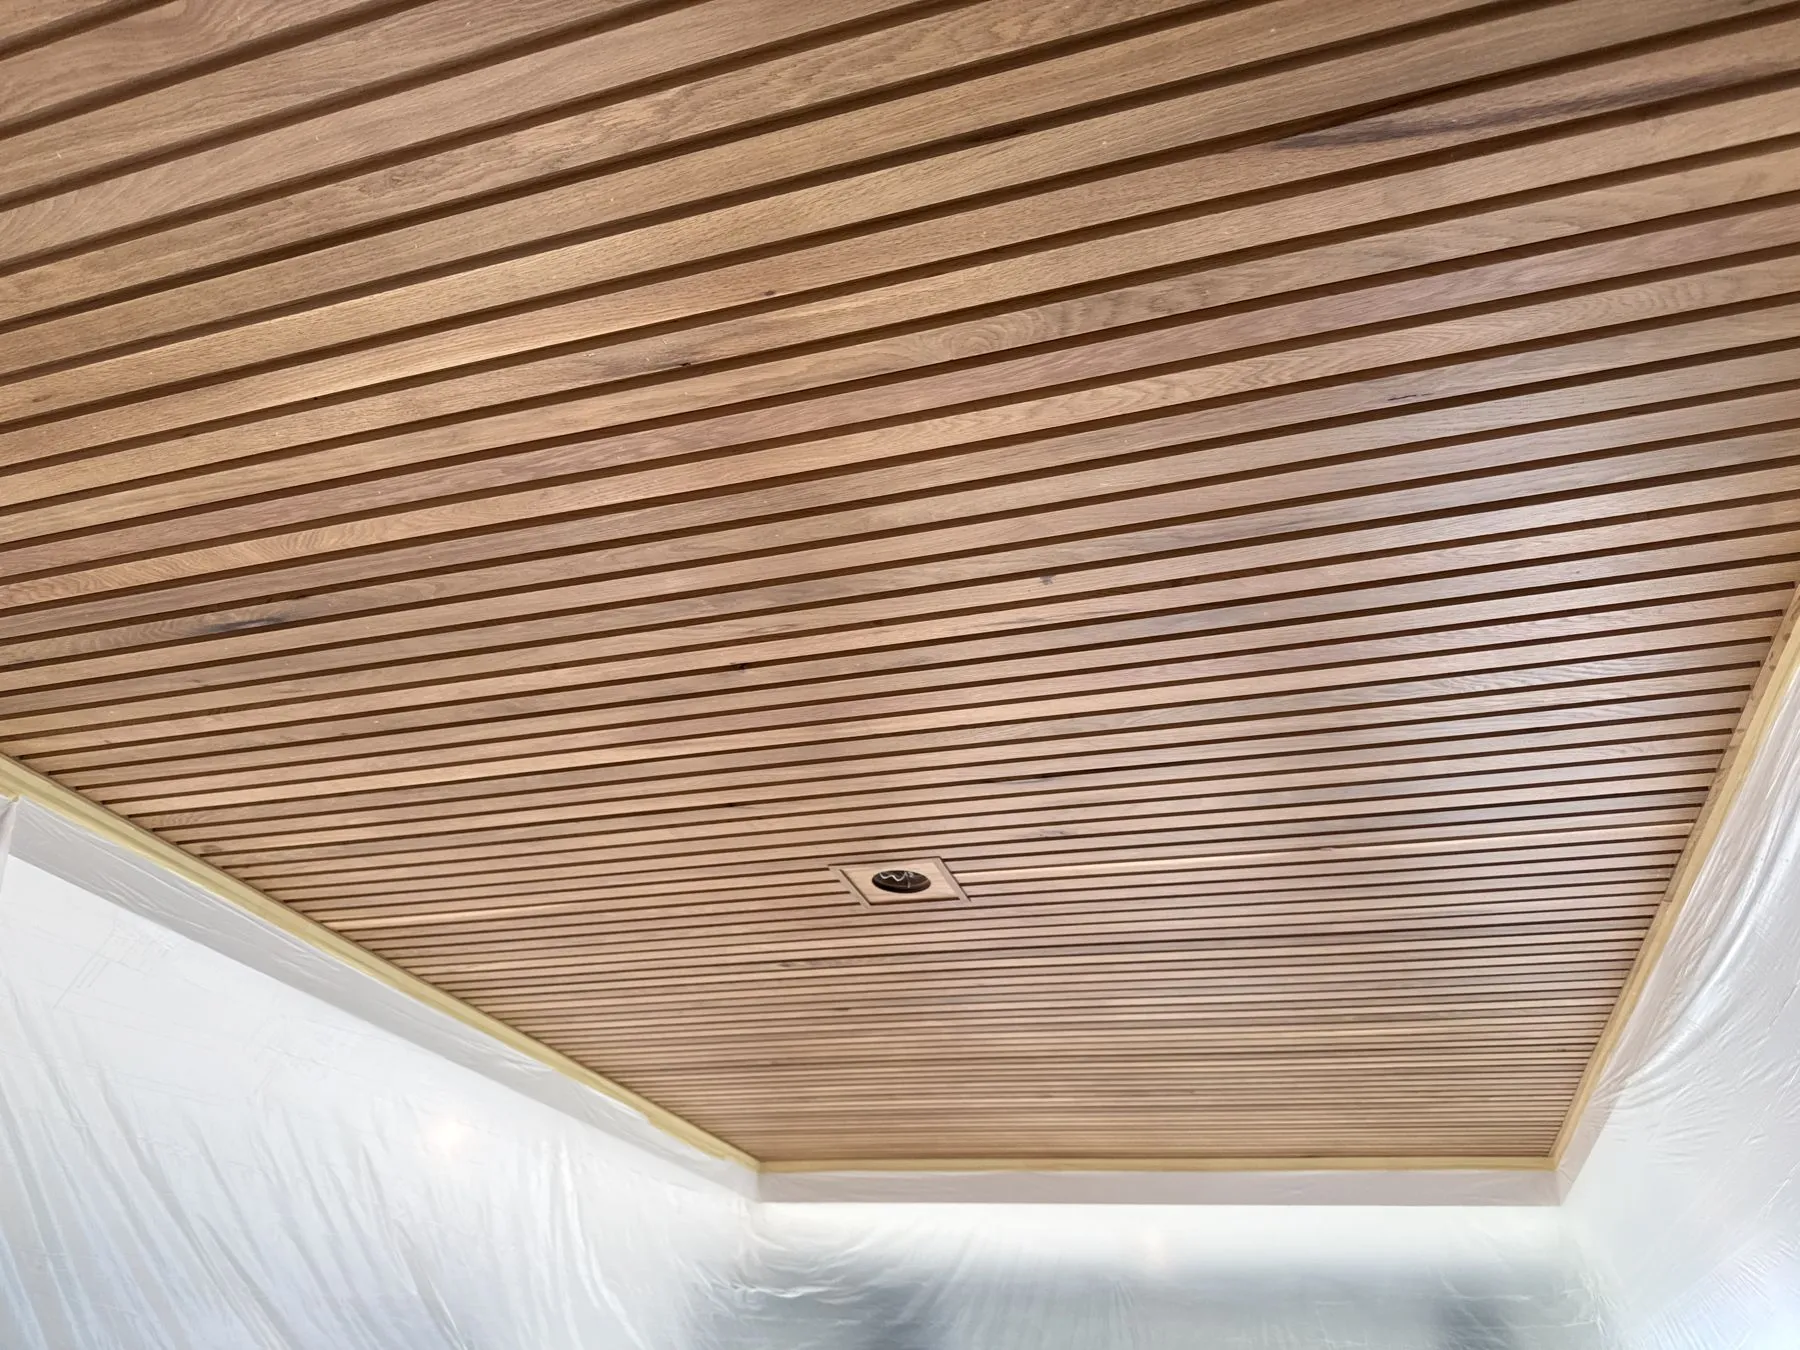 A clear-coated slat ceiling in Shorewood. The room is enclosed in plastic up to the ceiling line and the trim is taped off.
While we spray, air movers ducted out a window pull the paint mist and the odor out of the house, so they do not drift into the rooms you are using and the smell clears faster. Expect the room to be closed the day it is masked and the day it is sprayed.
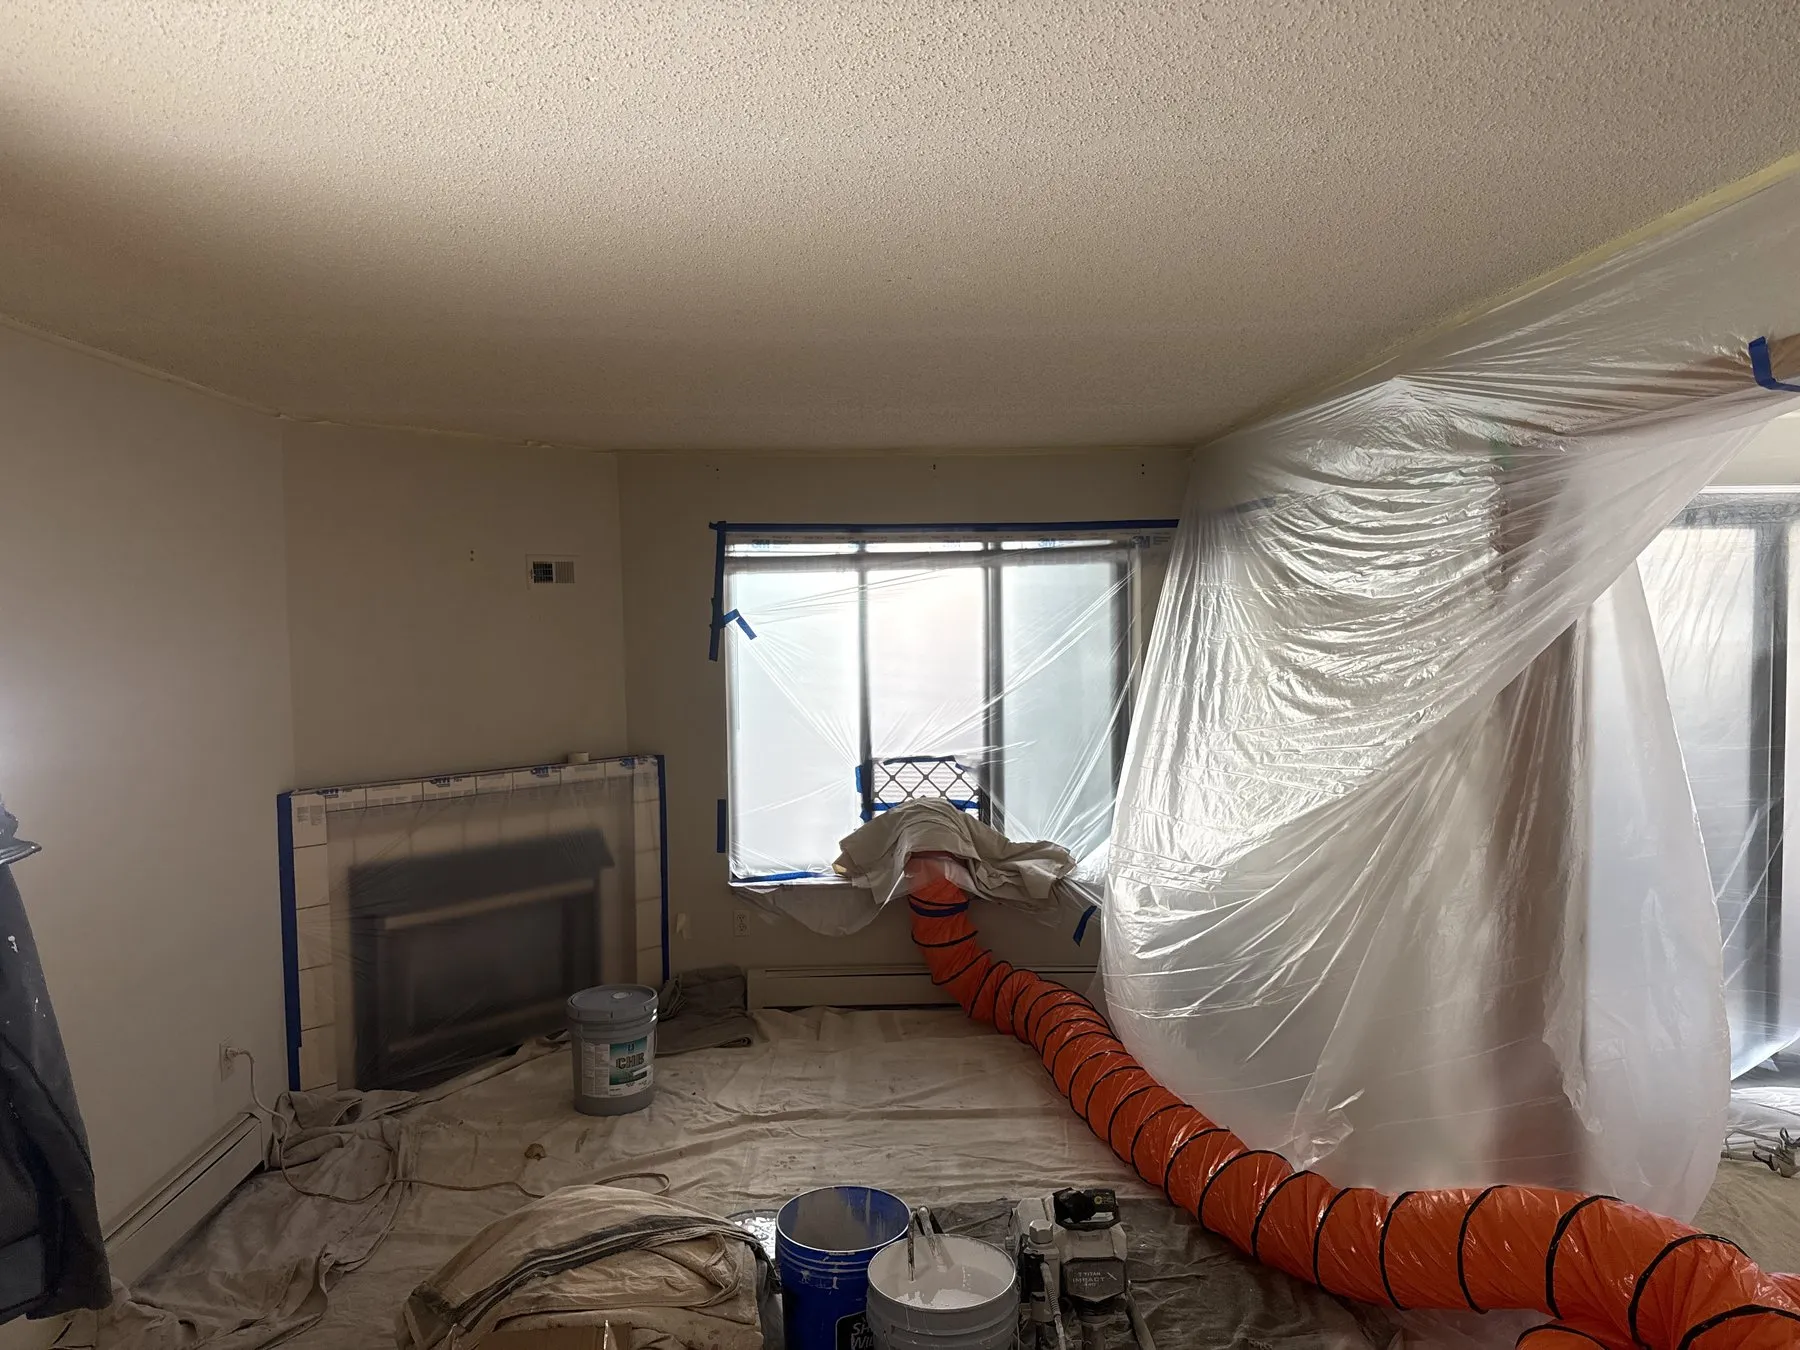 Air mover ducting run out a covered window in the same condo, with the fireplace masked.
The order on a ceiling-and-walls job
- Protect and mask. Floors, walls, windows, doors and fixtures covered.
- Repair. Patches on the ceiling are textured to match.
- Spray the ceilings. Usually two coats of flat ceiling paint.
- Remove the plastic. The walls are now exposed for their own work.
- Paint the walls. Cut in and rolled, room by room.
- Clean up. Masking removed, covers reinstalled, touch-ups, vacuuming.
Planning for a ceiling job
- Move what you can out of the rooms. Anything left is pushed to the center and wrapped, but the less in the room, the faster masking goes.
- Plan where you will sleep if bedroom ceilings are included. We sequence bedrooms so they are usable at night wherever possible; tell us which rooms matter most.
- Popcorn ceiling removal is wetter and messier. The texture is misted and scraped, so the room is sealed completely and cleaned daily. Homes built before the mid-1980s need an asbestos test first. Details are in the popcorn ceiling removal cost guide.
Kitchen cabinet jobs: planning to live without part of your kitchen
A cabinet job takes about one to two weeks from the day the doors come off to the day they go back on. The kitchen works for most of that time. The exception is the stretch when the cabinet frames are prepped and sprayed in place: about three to four days in a typical kitchen, longer in a large one, with the kitchen sealed in plastic.
First: doors and drawer fronts come off
Every door and drawer front is numbered to its opening, the hinges and pulls are bagged, and the pieces go to our off-site finishing space to be sprayed flat. You are left with open cabinet boxes. Dishes and food stay reachable.
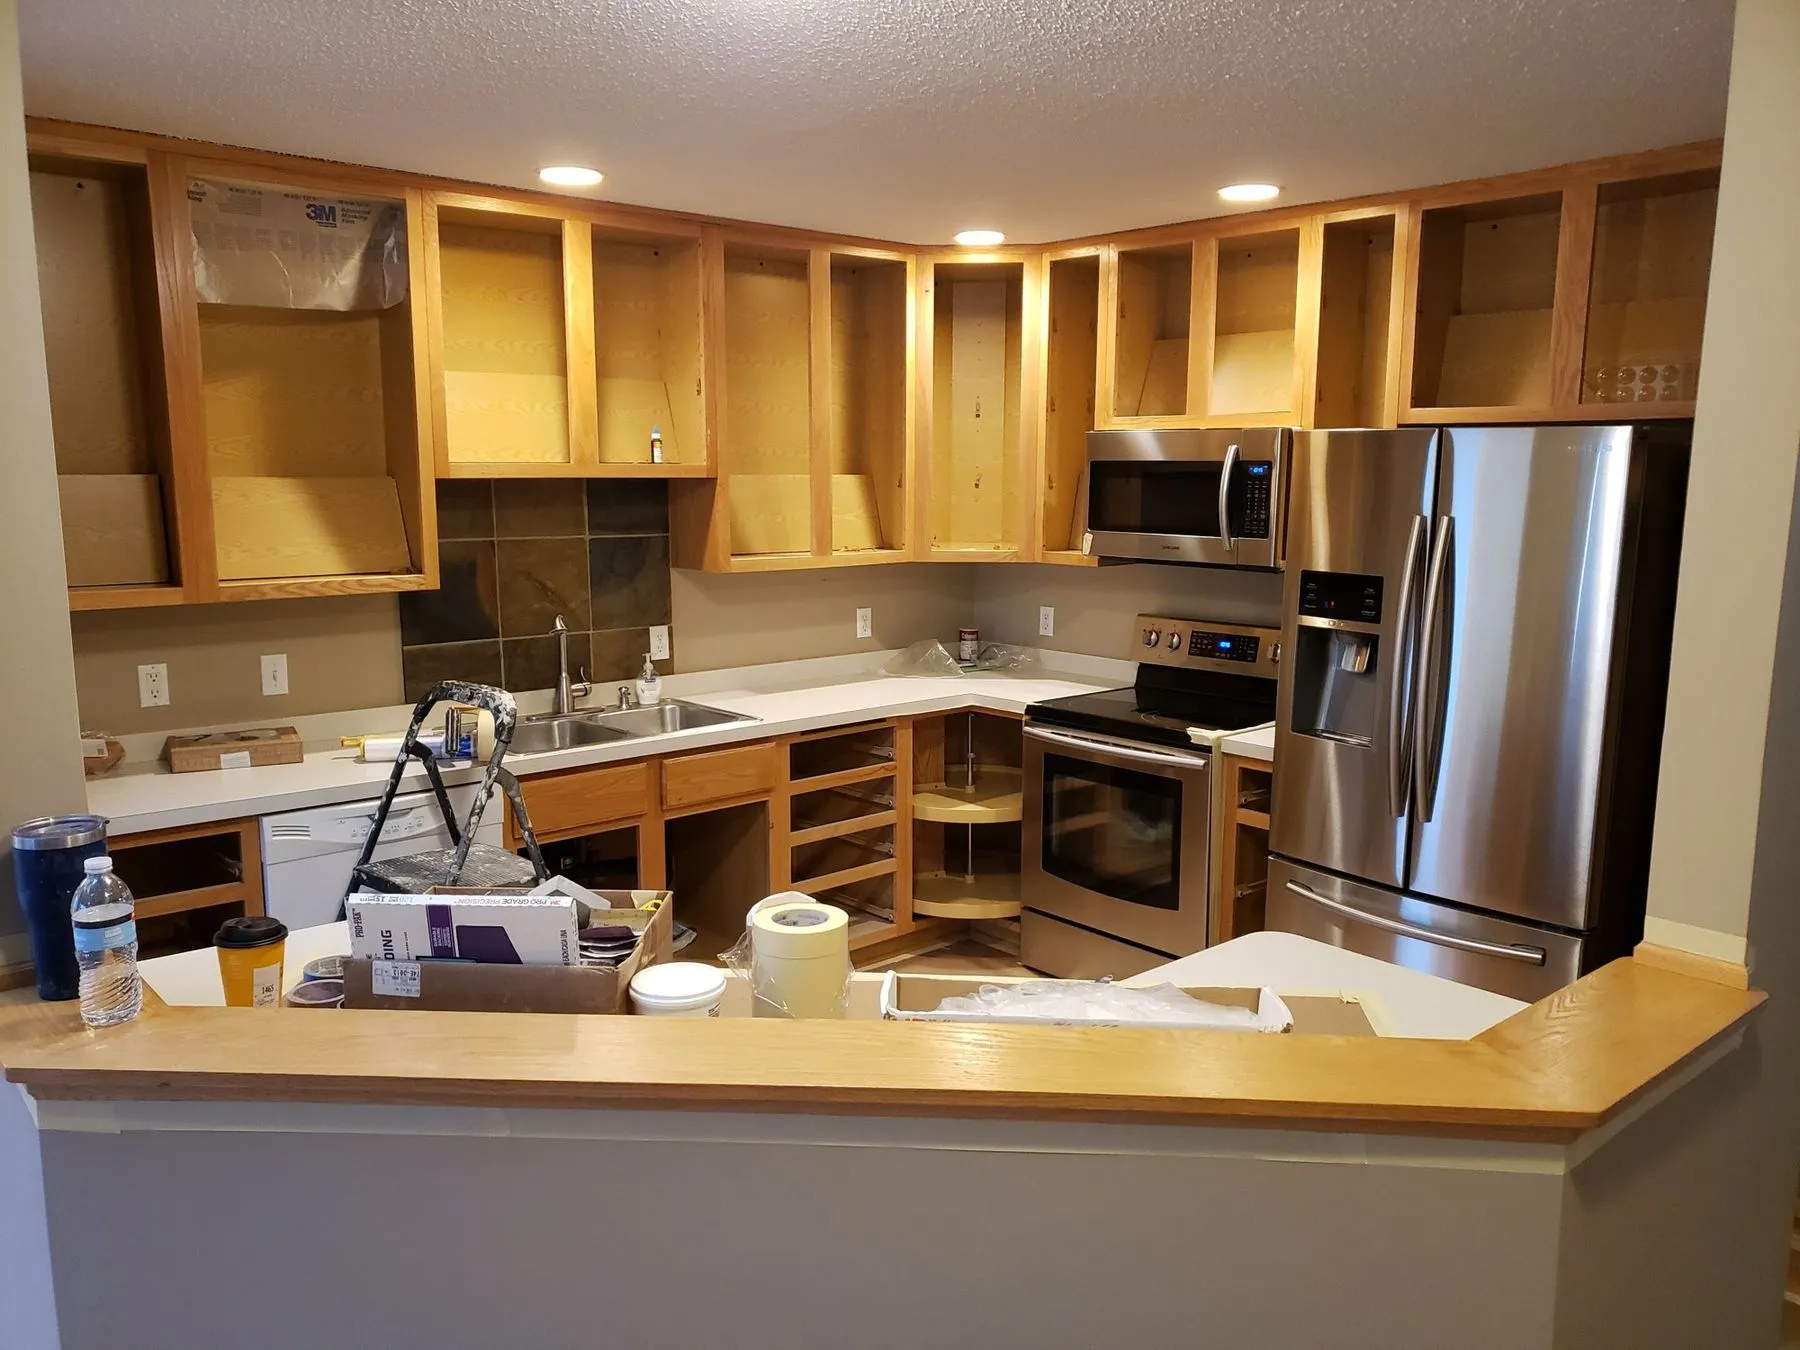 Doors and drawer fronts off, cabinet boxes open. The kitchen still works at this stage.
Frame days: the kitchen is closed for three to four days
The cabinet frames are finished in place, and it takes more steps than people expect. In a typical kitchen this runs three to four days; a large kitchen takes longer. The kitchen is wrapped floor to ceiling the whole time — the refrigerator, range, sink and dishwasher included.
- Mask the walls, ceiling, countertops, backsplash, appliances and floors.
- Clean every frame to remove cooking grease and hand oils.
- Sand so the primer has something to grip.
- Prime.
- Patch dents, dings and open seams, then sand.
- Prime again over the patches, then sand.
- Spray the first finish coat, then sand.
- Spray the second finish coat.
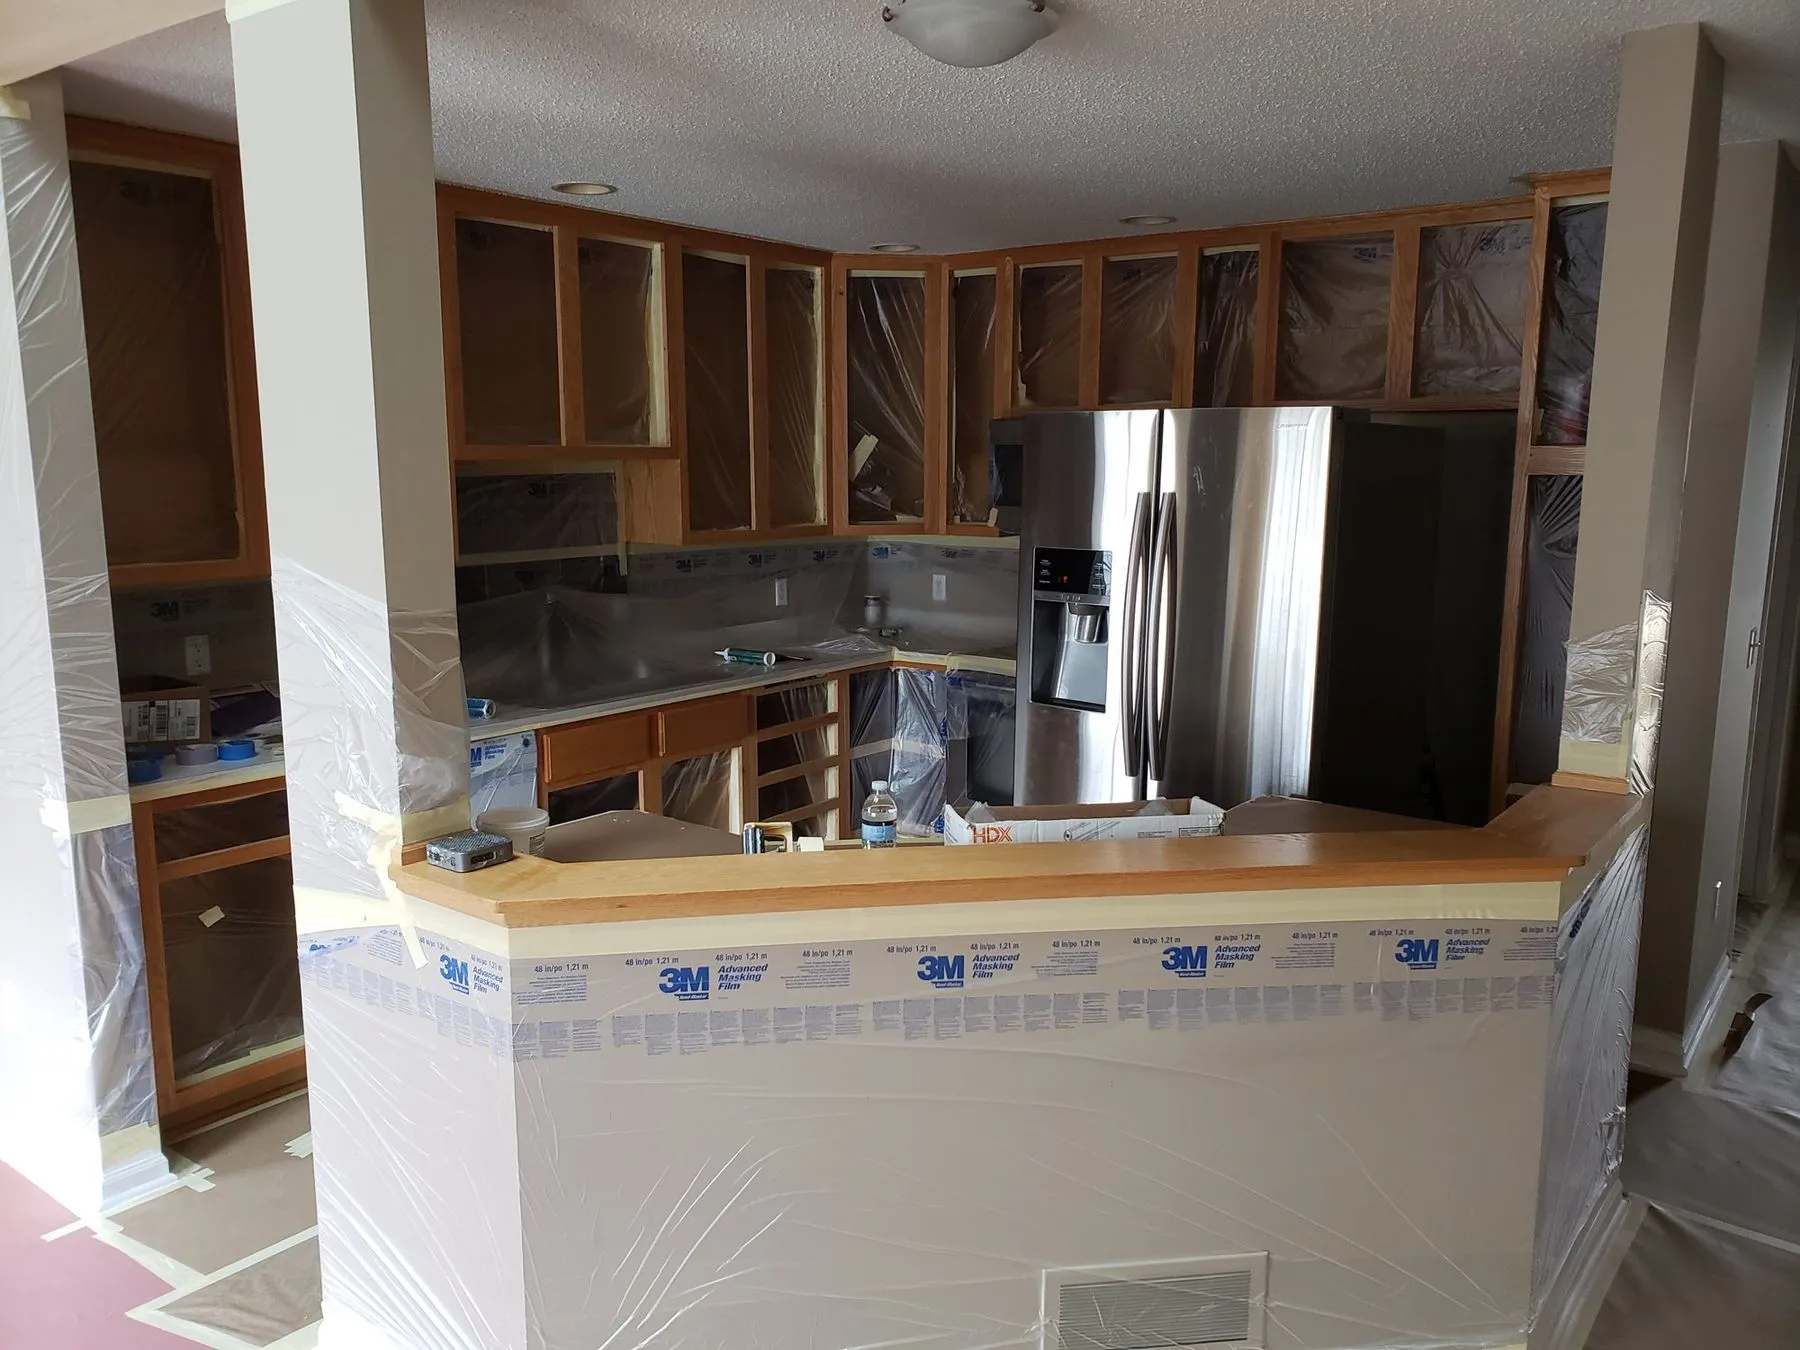 Frames masked and countertops covered before cleaning and priming.
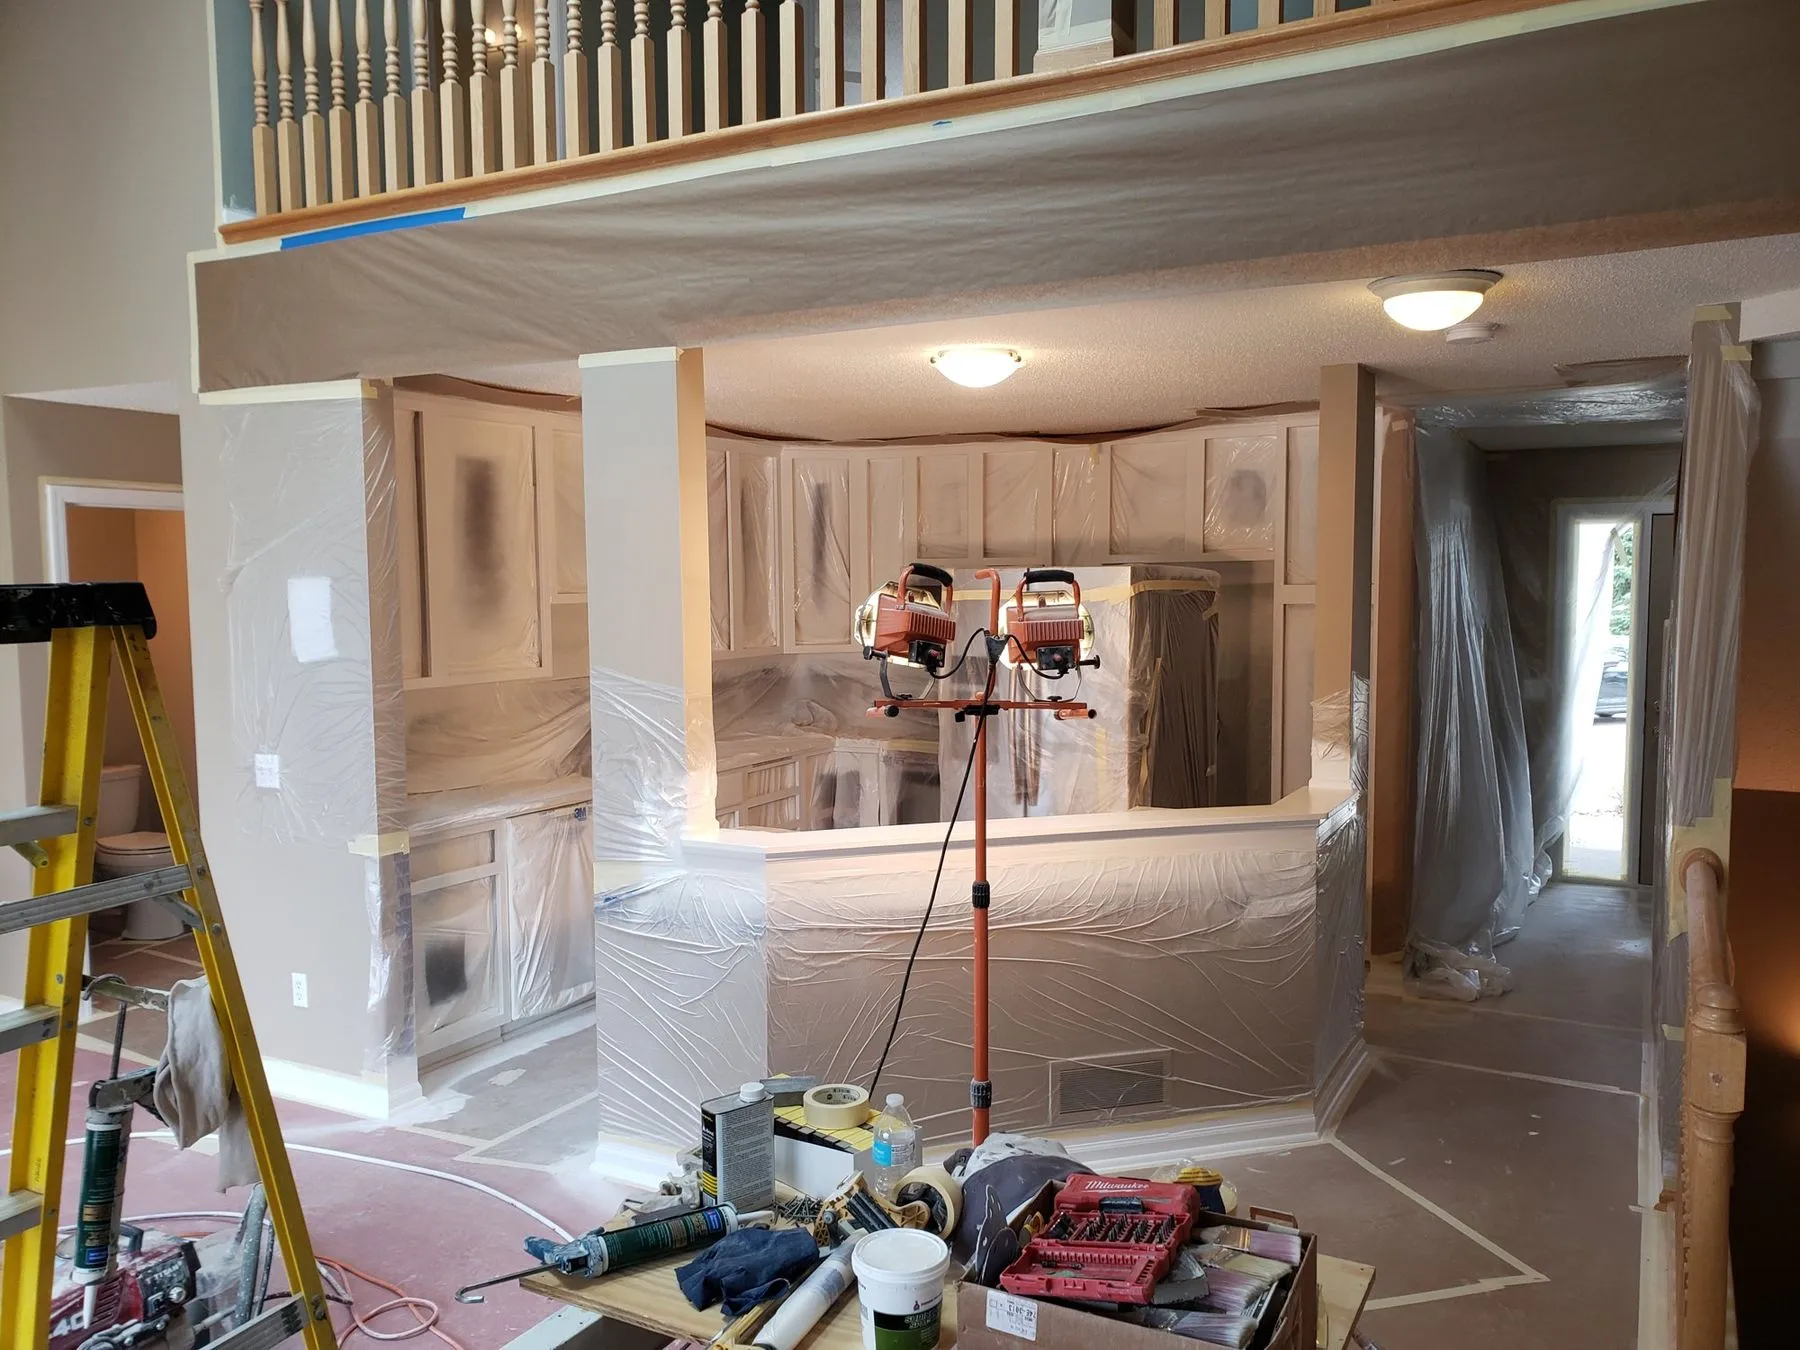
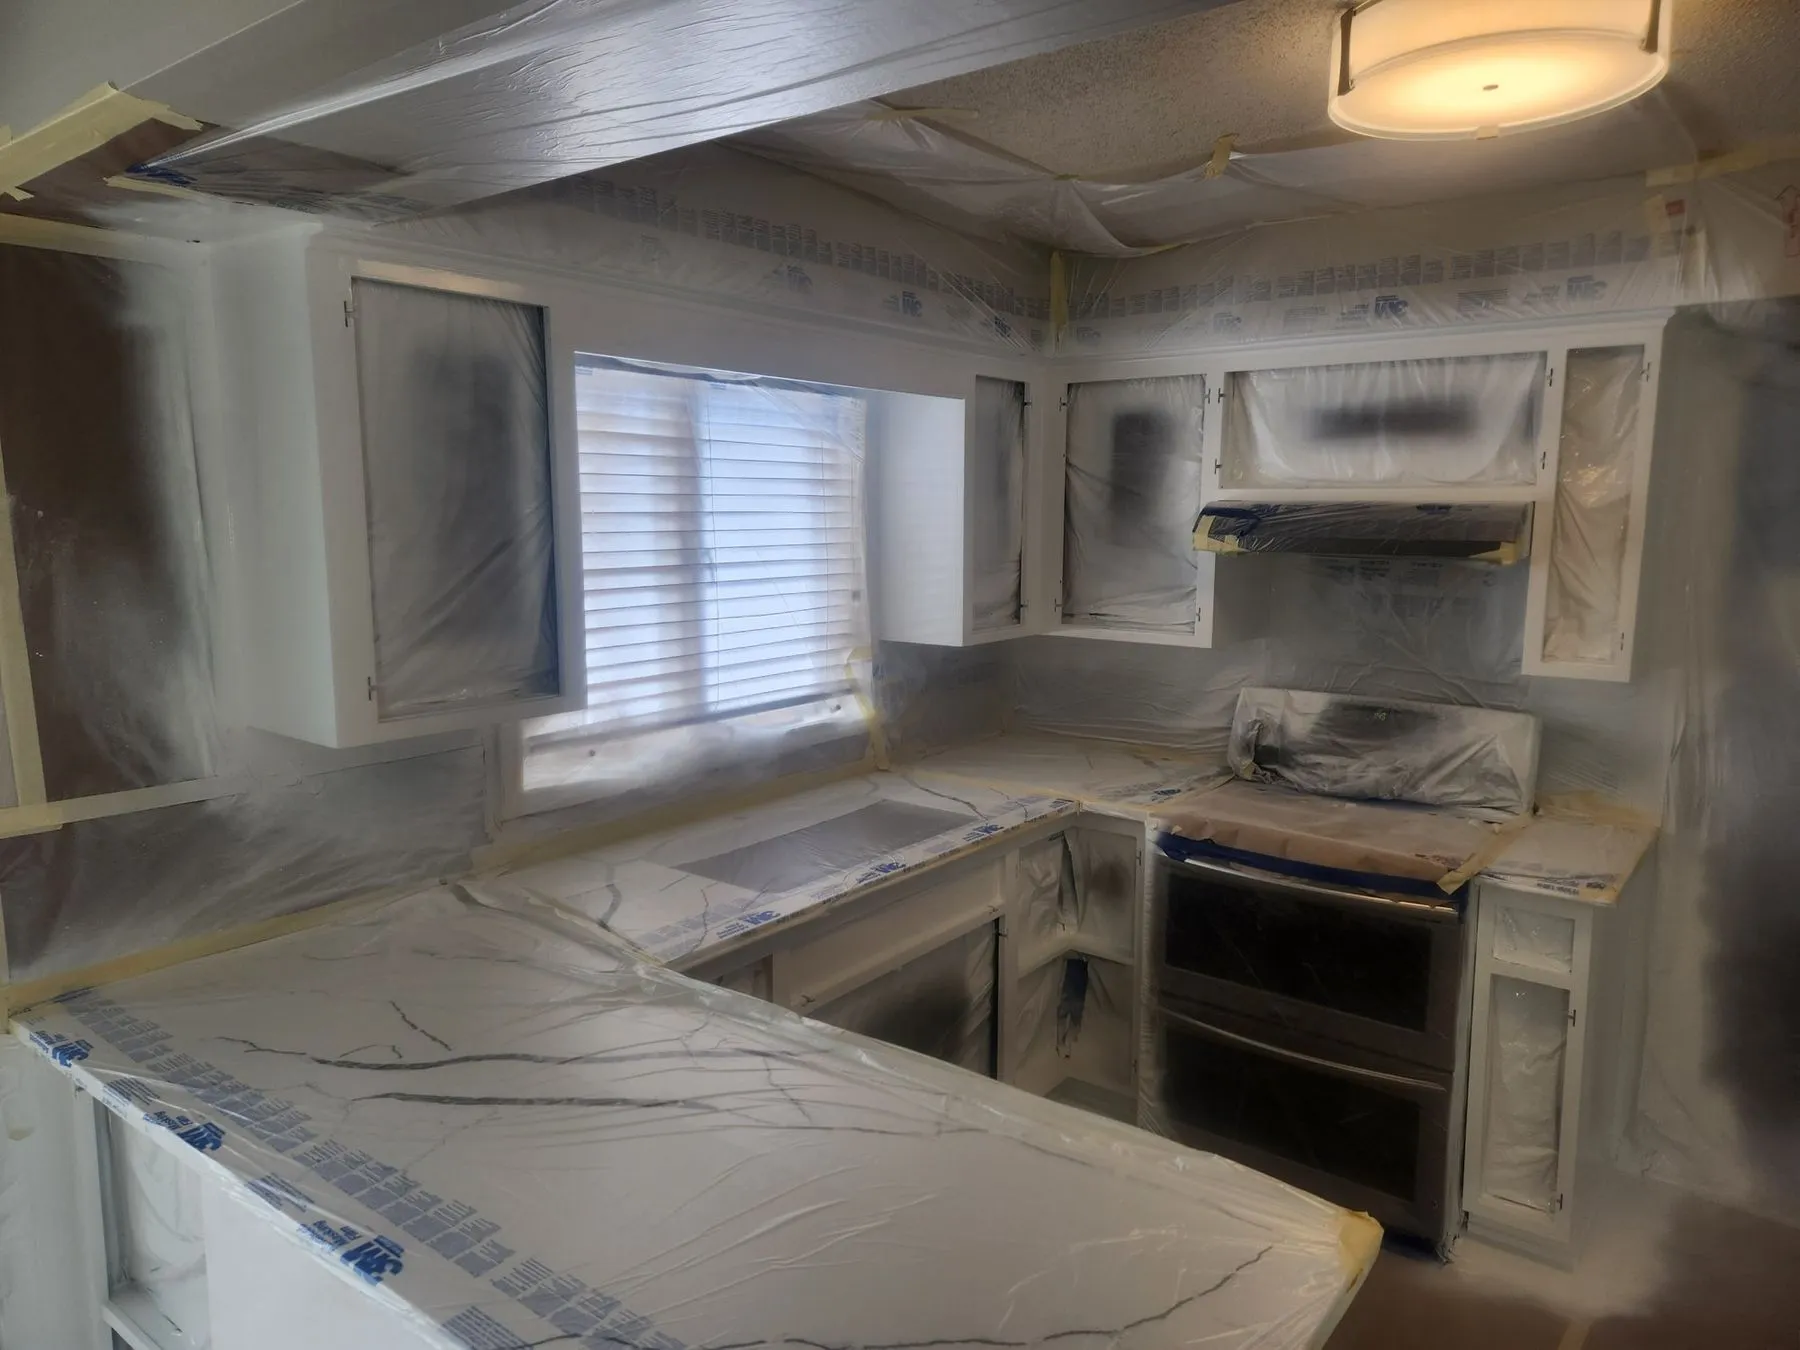 Two kitchens on spray day. Everything that is not being painted is under plastic, including the appliances.
Doors come back
Doors and drawer fronts return once their finish can be handled without marking. Hardware goes back on and every door is adjusted to hang straight. The enamel keeps hardening for several weeks after that; see painted cabinet cure time and care.
How to plan your kitchen around a cabinet job
- Empty the cabinets and drawers before we start. Contents in open boxes collect sanding dust, and frames cannot be masked around shelves full of dishes.
- Set up a temporary kitchen in a dining room, laundry room or basement: microwave, coffee maker or kettle, a toaster oven, paper plates, and a bin for the dishes you use daily.
- Plan for the fridge being wrapped. While the kitchen is sealed, keep what you need in a cooler or a second refrigerator.
- Pick a sink for dishes. A laundry or bathroom sink works while the kitchen is closed.
- Plan easy meals for three or four days, more in a large kitchen — takeout, the grill, or meals that only need a microwave.
- Choose new hardware before we start. If new pulls have different hole spacing, the old holes are filled before painting, so we need the new pulls in hand early.
- Do not schedule a party for the week after. The kitchen is usable right away, but the finish is still soft. A holiday dinner is better three or four weeks out.
How we protect your living space
- Floors are covered edge to edge, with the edges taped so nothing slips under.
- Furniture is moved to the center of the room and wrapped in plastic, or moved out of the room.
- Plastic barriers with zip doors close off any area where we sand or spray.
- Vents, outlets and fixtures in the work area are covered or removed.
- A clear path through the house stays open for you, with stairs and hallways protected.
- Every evening, tools are consolidated, debris is removed and walkways are cleared.
- At the end, everything goes back where it was.
Read more about our process on how we work, or request a free estimate and we will walk your project with you and lay out the sequence room by room.